
Company Logo a three peak mountain scape with an outline of a yellow sun and two blue wind wisps and Legend Homes in serif font below the mountain
Q

Design Approach

Building Process

About Legend Homes

Net Zero Education

Portfolio

News

Home

Net Zero Home Plans

TC Legend Typical House

TC Legend Typical House

Ted & Jake did some virtual conference speaking last summer.

The subject was how to build an affordable Net Zero home.

The principles are simple. Here are the notes:


Design

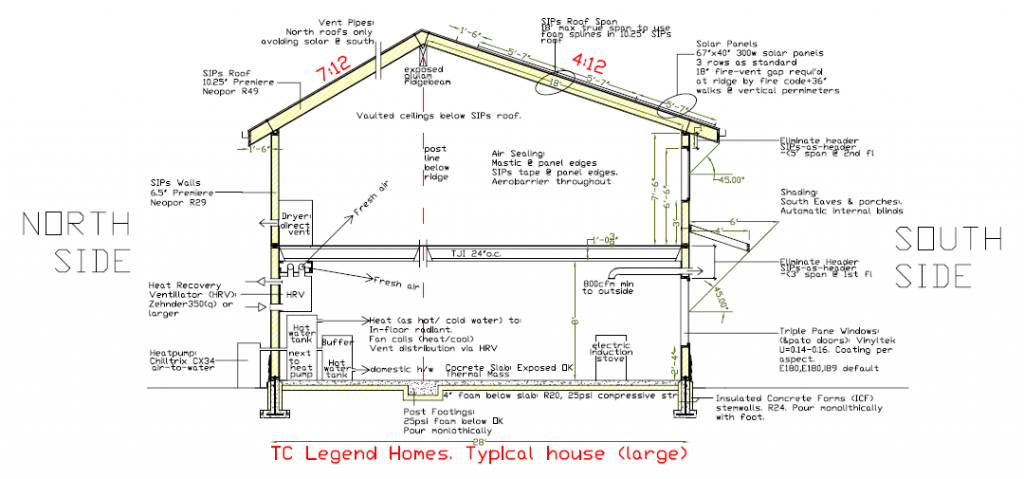
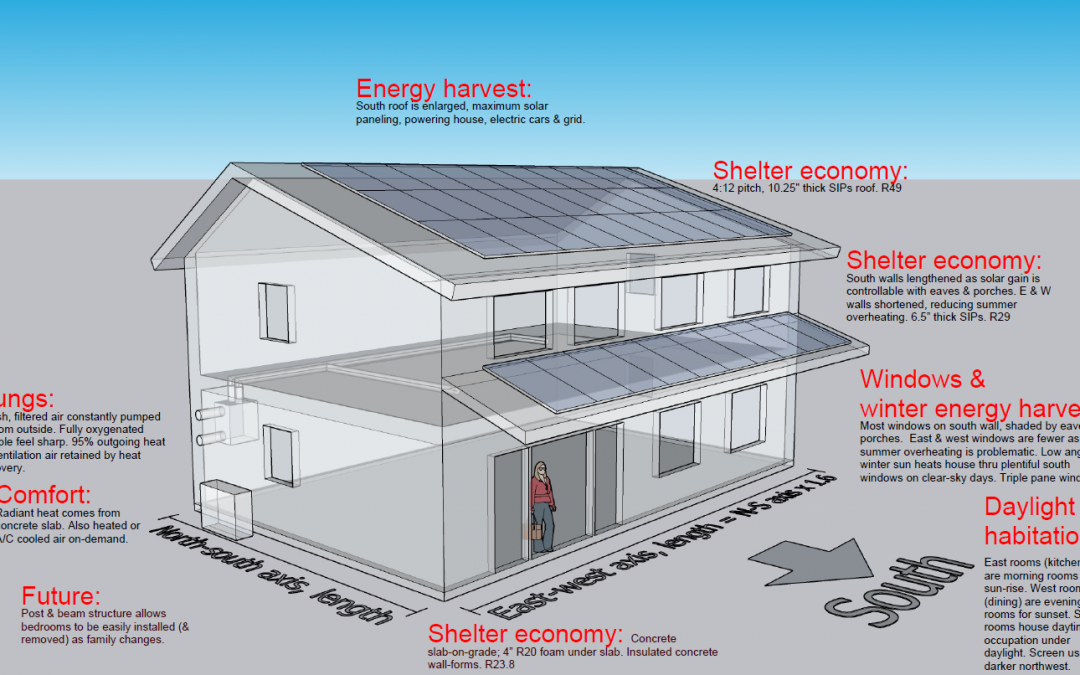
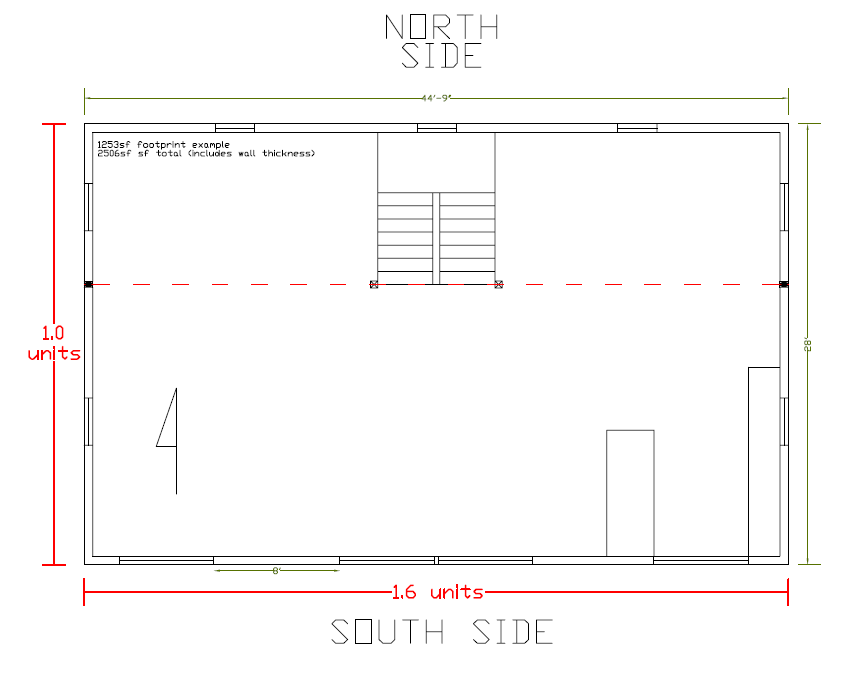
Simple, rectangular footprint, Conforming to the formula for the Pacific Northwest the rectangular footprint is; 1.6 units long on south wall, 1 unit deep east and west walls. No wiggles or bump-outs as they increase cost and reduce energy efficiency. The long side faces south to harvest winter passive solar heat. Short east and west sides are minimized to reduce exposure to hot, low angle sun.

Formula for glazing. To avoid overheating during summer, large east and west facing widows are avoided. South-side glazing is heavily preferred as there we can shade the hot, high summertime sun with eaves and shades, yet allow the low wintertime solar heat to enter.

Daylighting. Rooms needing great daylight: kitchen, dining room, etc. are located on the south side behind the plentiful south windows.

The low-light-requirement rooms: mechanical rooms, bathrooms, staircases etc. are to the north.

Correctly sized clerestory windows can bring daylight deep within the interior of the house.

Pitched roof. A huge south roof, pitching to the south collects solar power from roof-mounted PV panels. Often the south roof is asymmetrically large, to create space for the maximum number of PV panels, achieving Net Positive and powering an electric car. This is a new aesthetic - Environmental Modernism!

Right sized rooms: Interior spaces and rooms that are exactly big enough to thrive within, but no bigger. Well placed exterior doors access the outside when you need more space.

Energy modeling. Modeling the building during the design process ensures it’s on-track to meet Net Zero, and allows precise evaluation of the cost/ energy advantages of the various construction components, including the HRV.

We use the WSU component performance worksheet. It’s a free excel spreadsheet, specific to WA state.

Detail: Post & beam structure.  Fine-finished structural posts and beams enrich the interior at low cost, and allow easy remodel as no interior walls are loadbearing.

Detail: Slab-on grade. Fine finishing the concrete slab-on-grade floor gives a modern, durable interior at low cost. Not compulsory though, the slab can be covered with engineered floating floors.


Site selection

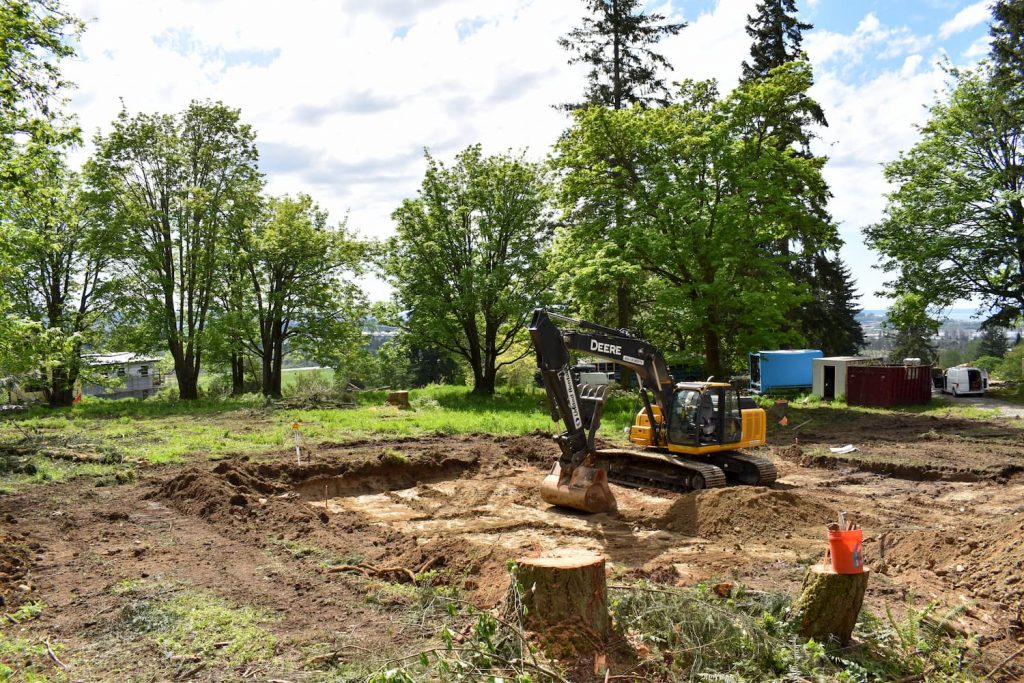
Flat lot: Lower construction costs by avoiding steep lots with expensive retaining walls, excavation, soils trucking and geotechnical involvement.

Utilities: Power, water, sanitary drainage/ septic, driveways. Utilities can cost over $80K to install on remote rural lots. The ideal lot has all the utilities stubbed-out in the street or on-site.

Solar exposure: An ideal site would have a clear sky to the south, down to the horizon so the building can harvest low, wintertime passive solar heat. If there were deciduous trees to the east and west, those trees could shade the east and west walls / windows in summertime but allow valuable winter light to penetrate once the leaves have all fallen off!

Critical Areas: Water in all forms is heavily protected in Washington State. The presence of wetlands, streams, lakes and ocean all add to the complexity and cost to build.


Construction

SIPs panel construction: Highly insulated R29 walls, R49 roof are fast to build and are inherently very air-tight. The thick roof panels span far and make vaulted roof space as standard.

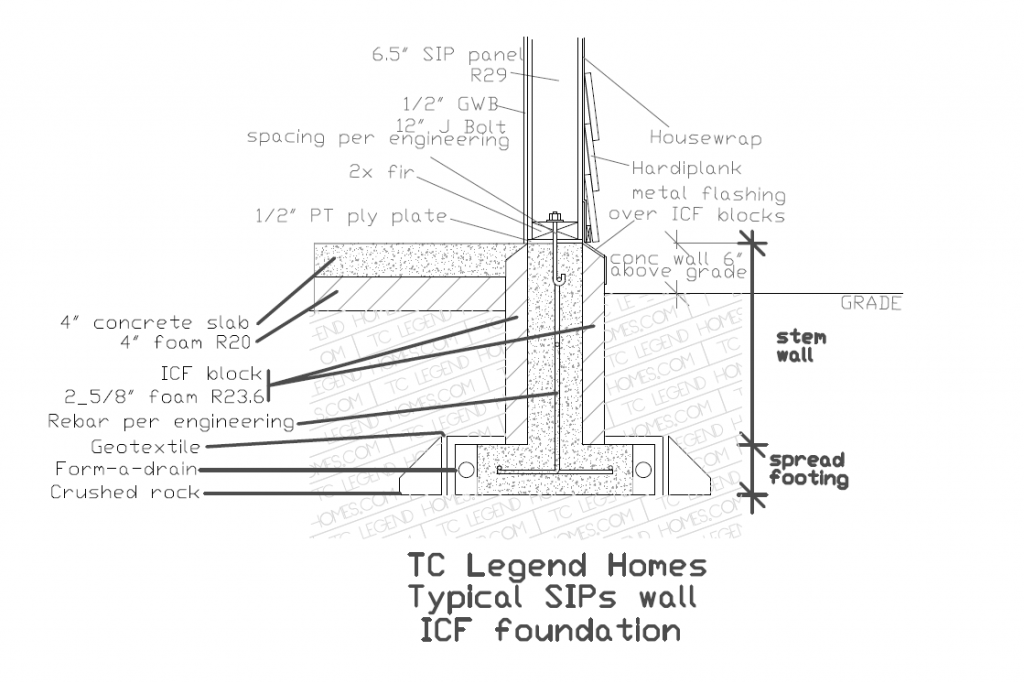
ICF formed stemwalls: Insulating the stem-walls adds R24 below grade, preventing the building from leaking heat at the slab edge.

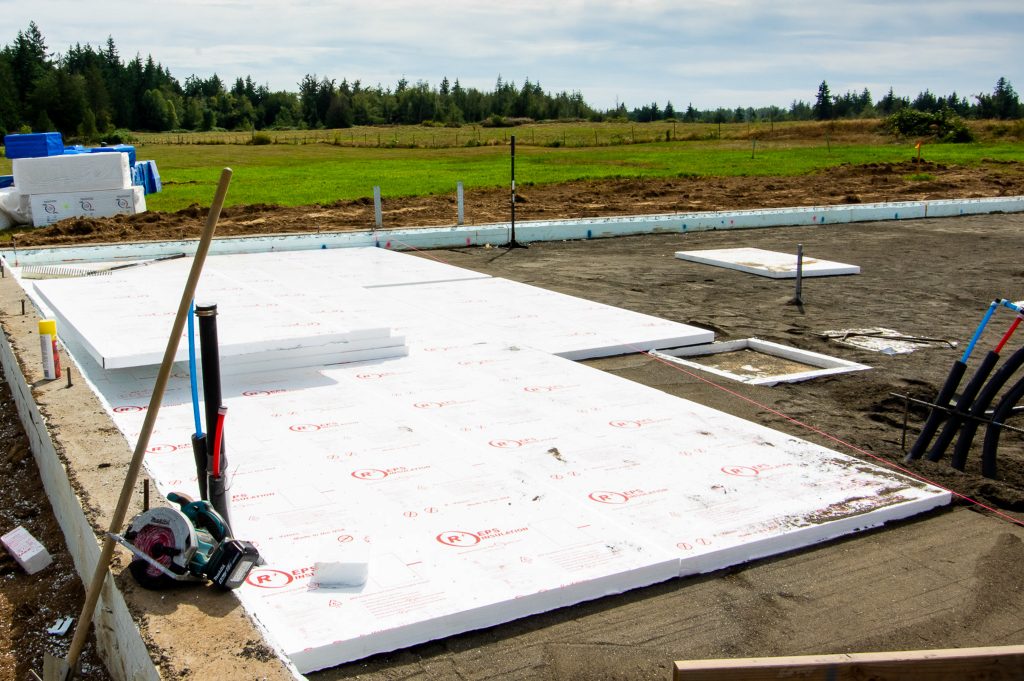
4” under-slab foam: R20 foam below the slab as standard.

Triple Pane windows: Standard.


Mechanical

Heat recovery ventilator (HRV): Delivering fresh air is essential in super-sealed modern buildings. HRV ventilators recover over 90% of outgoing heat, whist providing constant fresh exterior air, filtered to HEPA standards with particulates removed.

Heat pump. Electric air-to-air (Fujitsu), or air-to-water (Chilltrix) heatpumps are highly efficient and provide cold air conditioning in addition to heating.

Concrete floor: The slab-on grade is inside the energy shell (above the 4” R20 foam) and serves as a thermal heatsink; storing the house’s warmth, or cool, within the concrete. Protecting the heatpump from short-cycling and preventing temperature swings, even during a multi-day power-outage.

Energy star appliances: As standard.

Solar panels: As standard to achieve net zero, or net positive if an electric car will be driven.

How $200/ square foot?

The economics are made possible because the house is explicitly designed to achieve net zero and to cost $200/sf. The shell, mechanicals and living quality are best-of-breed, the finishes are durable, solid materials, and modest.

There is an economical point (~1200sf) where the house has to become two story to remain in this cost bracket.

Small houses below 1500sf cost closer to $250/ sf as the basic elements (heating, kitchen, bathroom, etc.) all still have to be present and are not reduced as the floorplan reduces.

$200/ sf is possible (for a NetZero house with solar installed) with a 2,000sf house.

If you want a small (e.g. 800sf) NetZero house for $200/ sf: Think about duplexing with your friends, triplex, multiplex, co-housing.
 

zero energy plans


Indoor Air Quality

Indoor Air Quality

It’s a dark winter evening. You leave the house and as you emerge outside you feel the cold, fresh air and you pop up, feeling sharp, awake, fresh and lively.
The operative word is ‘fresh.’

Sure, the air is cold and that helps, but in reality we’ve been building sealed buildings since the 80’s with gasketed doors and windows, old drafty houses are becoming fewer. Modern housing is very well air sealed to prevent energy loss. However, the ventilation systems have not been developed and installed at the same pace as the air sealing.
So we need to get fresh air into our houses. We’ve needed more fresh air since the 80’s and as a population we’ve become used to poor air quality.

Yes building code does require ventilation, but often it’s switched and folks don’t hit those switches. We need ‘continuous ventilation’.

The best system is the Heat Recovery Ventilator (HRV). The outgoing ‘dirty’ air is blown out of the house, but before it leaves the heat is stripped out and imparted into the incoming ‘clean’ air. The HRV is always on, and has filters so the air really is clean. HRV’s can be 95% efficient, and in the Lake Stevens house the HRV reduces the maximum building heat load from 14,450Btu/h to 12,800 Btu/h.

The Zhender HRV’s we fit can have Co2 sensors, so they bring in more air when more folks are inside breathing. Also humidity sensors so moist air, the "building-killer," is automatically removed. Manual boost switches and wireless control are all becoming standard.
The air is still dirty!

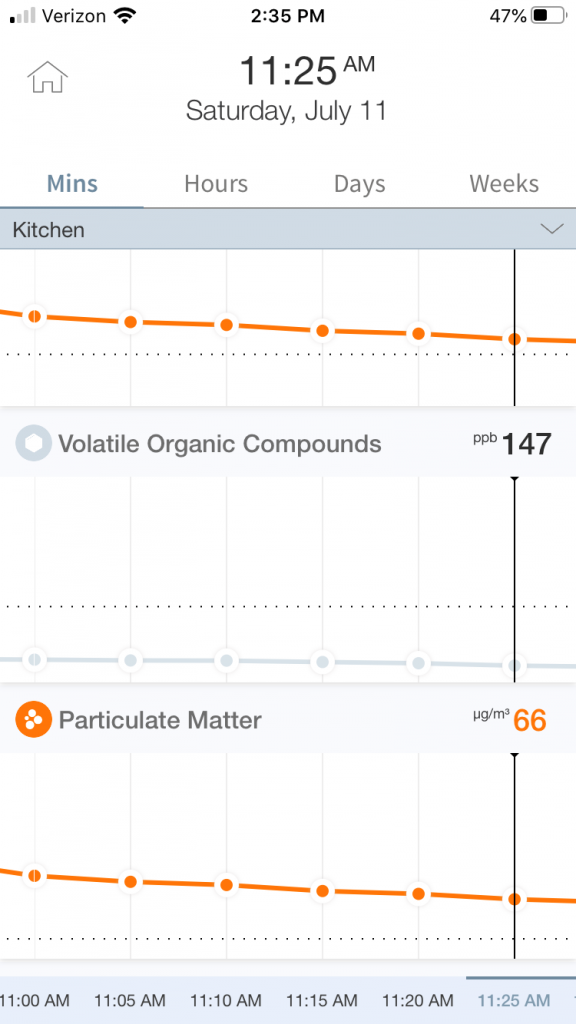
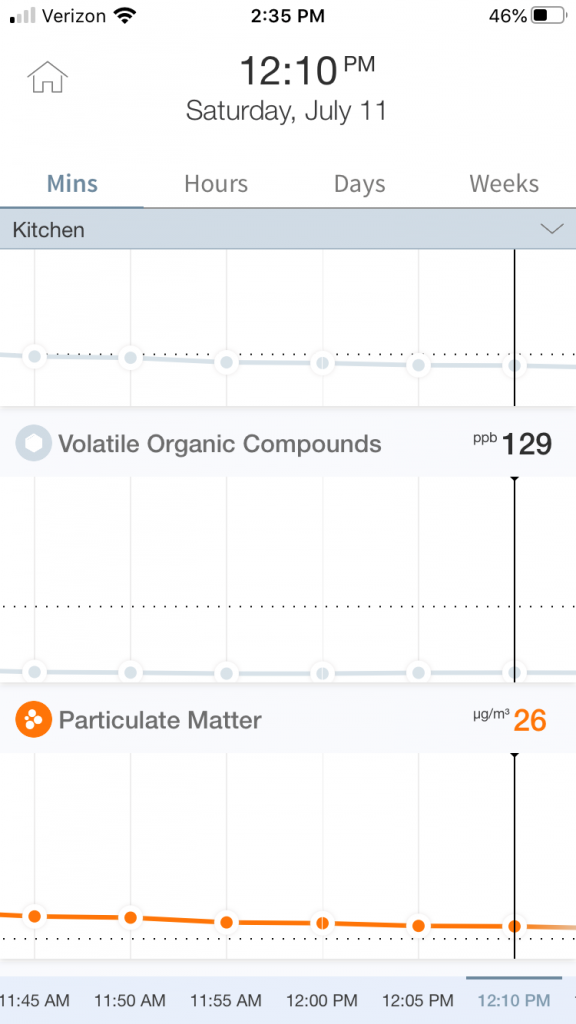
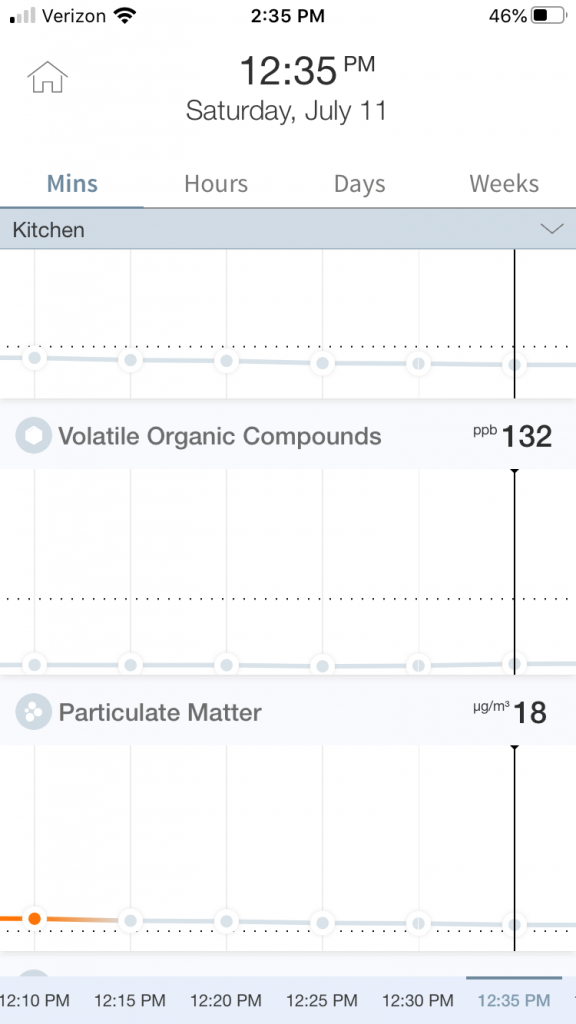
Ted Clifton, Co-Owner and Founder of TC Legend Homes, has an air quality monitor in his home. Cooking is a real problem.

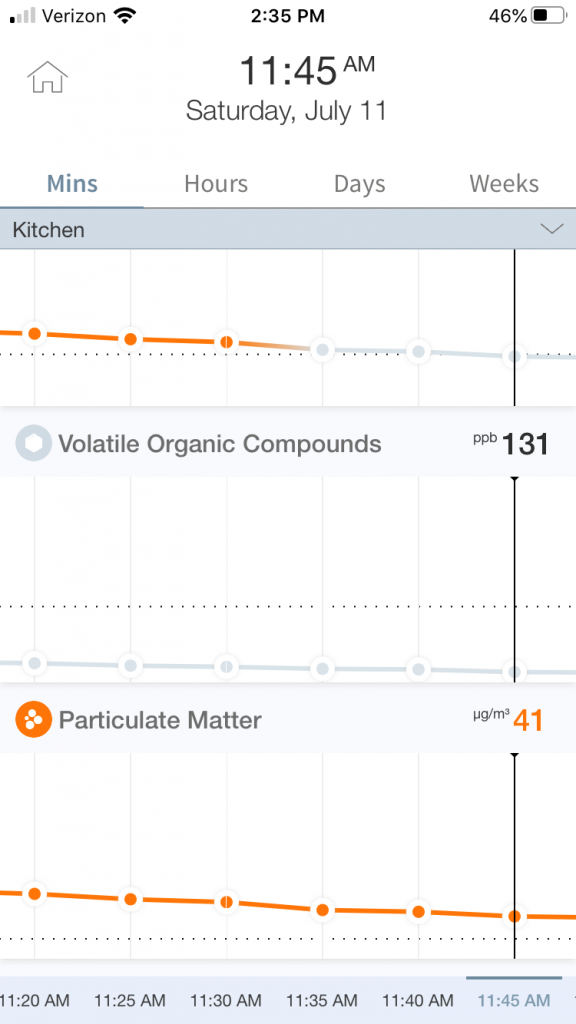
The screenshot from Ted’s Footbot monitor shows that it took over an hour for the 200cfm balanced fan to remove the particulates down to the monitor-defined safe level. Ted was cooking hash browns and eggs on a Saturday morning. It is important to note that Ted’s 200cfm fan has a second 200cfm intake fan so it’s a balanced system and can be interpreted as a 400cfm fan.

The lesson is that range hoods are critical to maintaining indoor air quality and should really be sensor-activated. At TC Legend Homes we will be specifying more powerful units; perhaps 800cfm as standard. The presence of particulates indoors is linked to asthma.

The arrival of home automation will easily address this problem and a quick Google search for wireless range hoods yielded plenty of cost-effective models.

The next part of the test is to cook the same hash browns and eggs next Saturday, leave the range hood off, then we’ll see how long it takes a modern super home (Ted lives in the Bellingham Powerhouse) to clear the air with just the HRV.


Learn more about Indoor Air Quality HERE


What are SIPs?

What are SIPs?

What are SIPs?

Structural Insulated Panels.

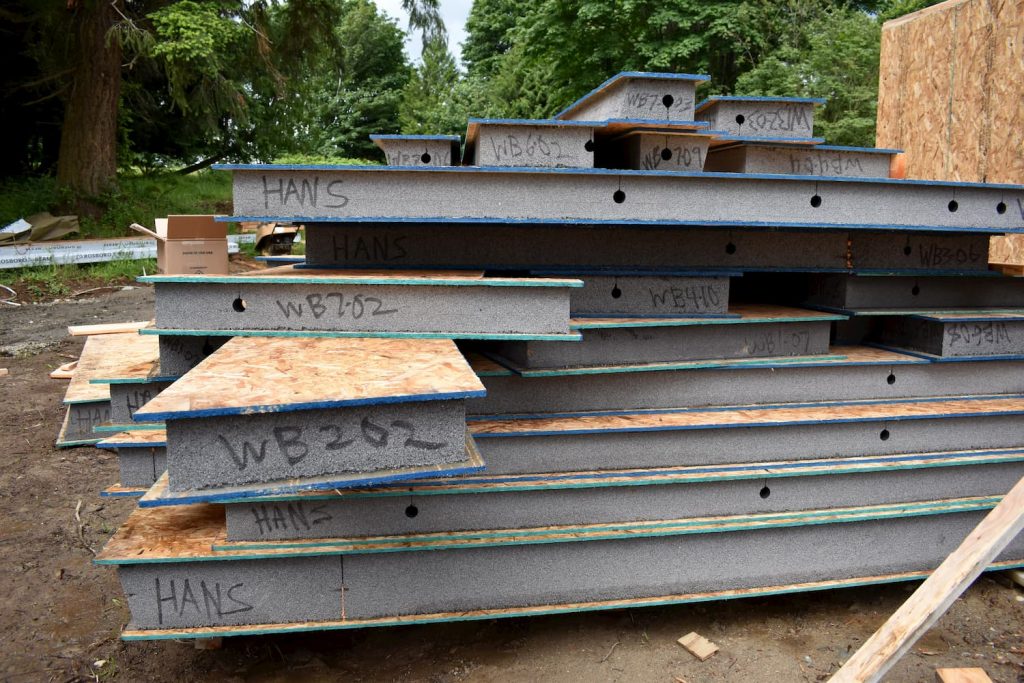
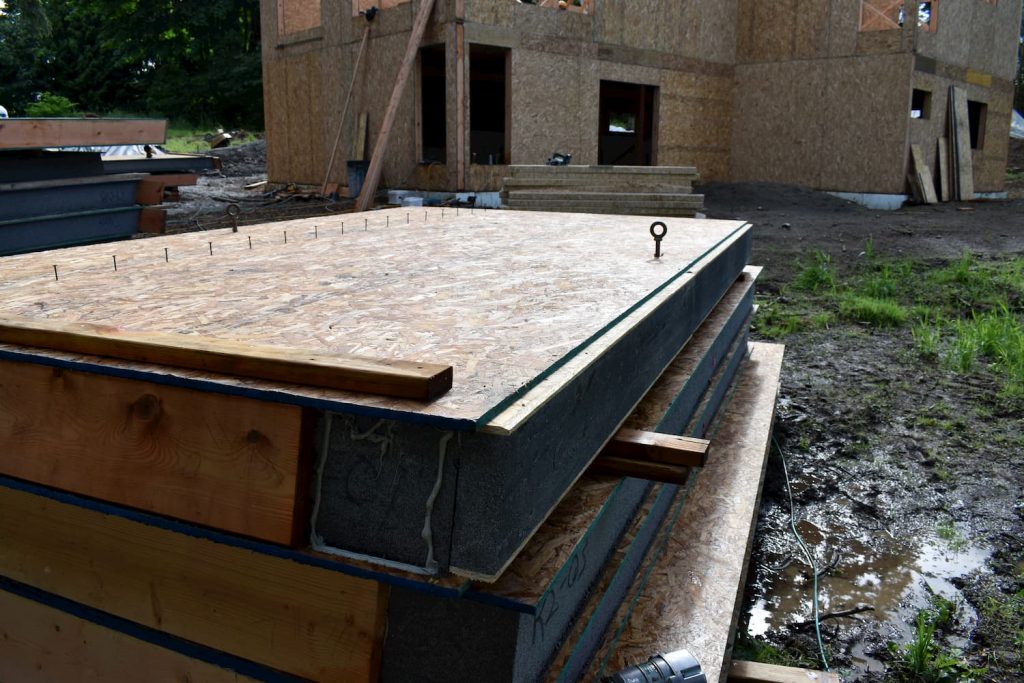
SIPs are wall, roof (and sometimes floor) panels. Fabricated from a slab of foam sandwiched between two plywood sheets. Actually, it’s not ply it’s OSB (oriented strand board).

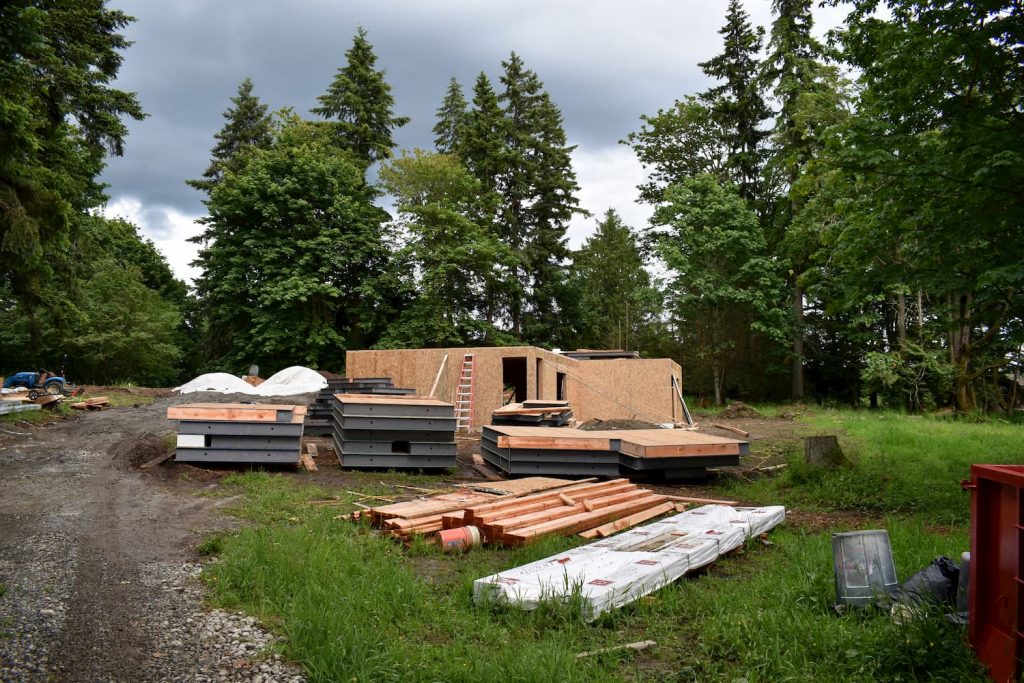
The sandwich-panels can be up to 24’x8’ and are made in the SIPs factory, in our case Premiere-SIPs in Puyallup. The doors and windows are cut-out in the factory, a stack of pre-fabricated house panels are loaded onto a trailer and arrives on-site where the SIPs are assembled... a bit like Legos.

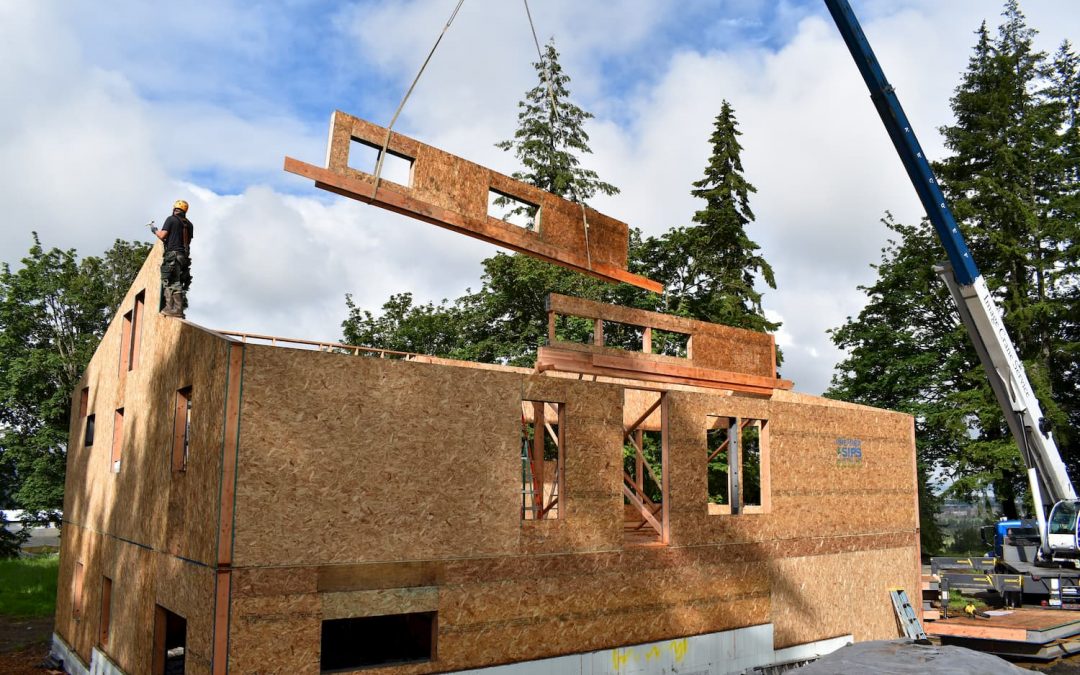
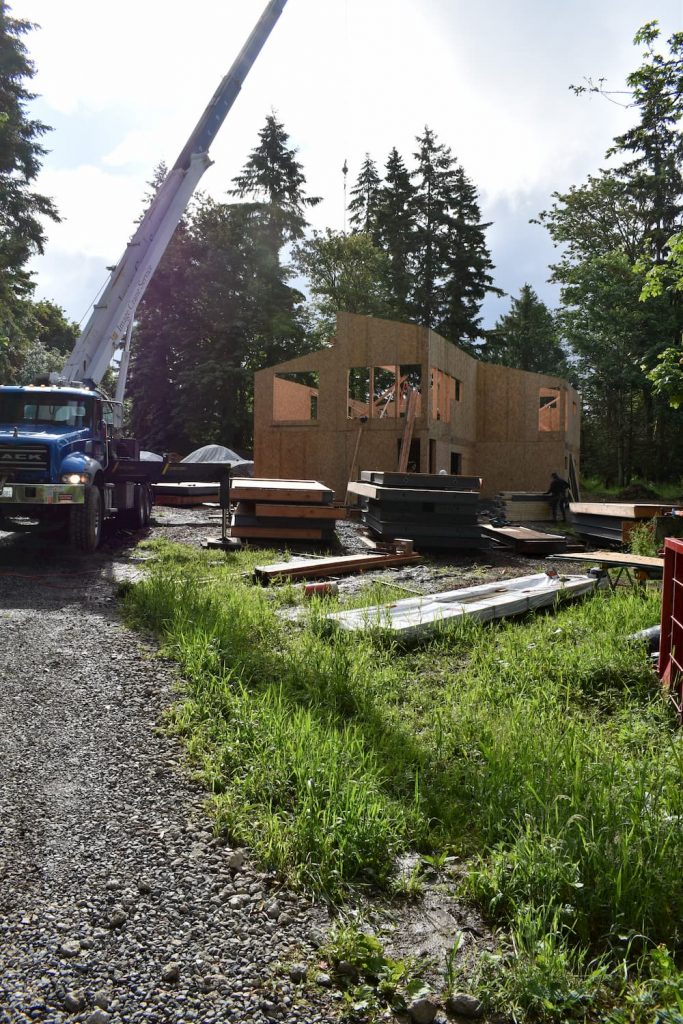
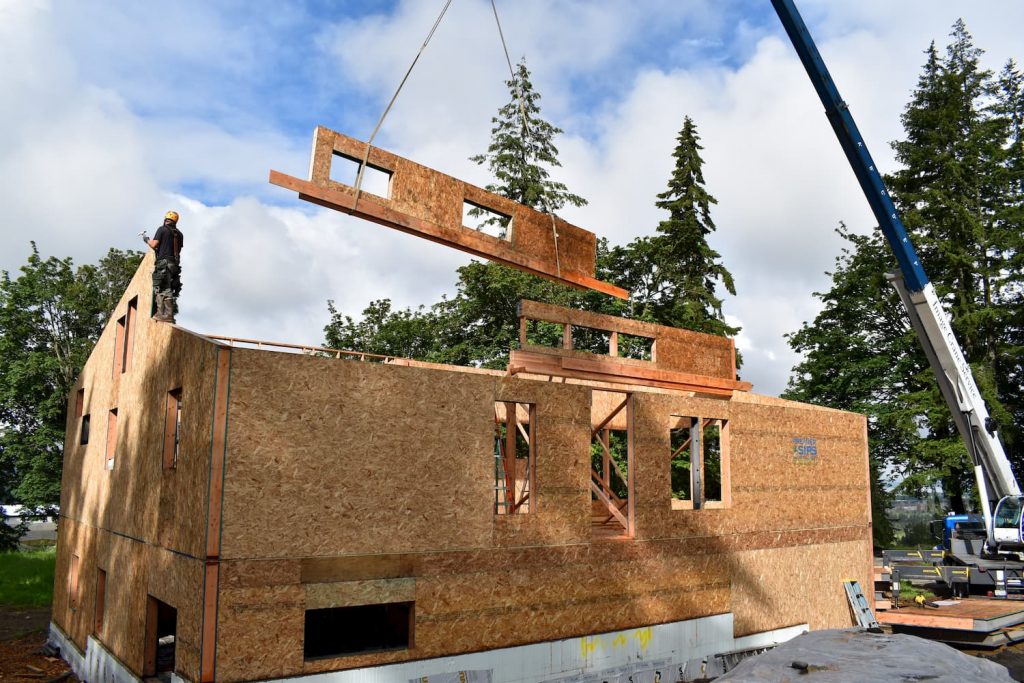
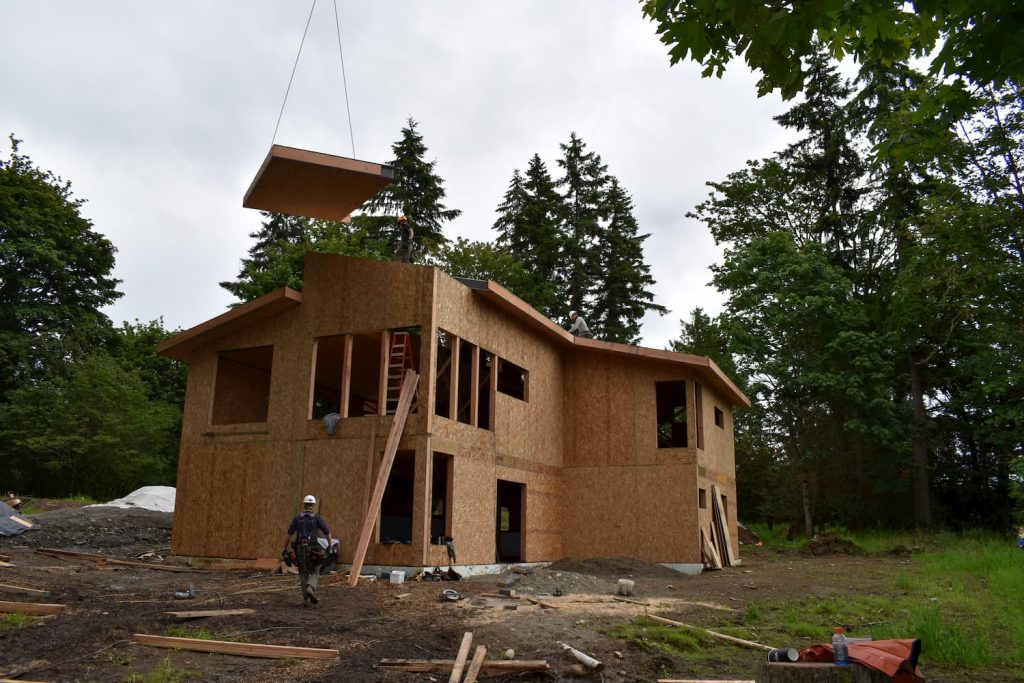
Because TC Legend Builds affordable Net Zero energy houses, we use our crew to assemble the wall panels, man-handling them into place, but a crane can be used for walls. We do use the crane to set to thicker, heavier roof panels.

Our goal with SIPs panels is to create a continuous foam box, surrounding the inside of the home. When you remember that there’s 4” foam under the concrete slab, the 6” foam walls and 10” foam roof trap all the heat inside the house.

The ‘S” in 'SIP' stands for structural and the panel-system carries the load of the house, floors and roof, and does not need the sticks of vertical lumber you see in the walls of a conventionally framed house.

How are SIP panels joined? We’ll use the walls as an example:

The SIPs panels typically have the interior foam held-back to form a 1.5” gap at the panel edges. Two panels are joined by setting a ‘spline’ into the recessed gap on one panel, then sliding the second panel over the spline, nailing the connecting spline in place through all four edges. Splines can be made of 2x6 lumber (L-spline), foam mini-SIPs (called S-splines), or an insulated TJI spline (called an I-spline).

Because a 2x6 lumber splines touches both the warm inside of the house wall, and the cold exterior of the house wall, they are said to cold-bridge. A cold-bridge creates a poorly insulated pathway for the warm inside energy to travel to the cold exterior. There a many cold-bridges in conventional framing and that’s why we don’t do it. We aim to minimize L-splines as they have an insulating value of R7.8, compared to R29 for our Neopor graphite foam 6.5” Premiere SIPs wall panels.

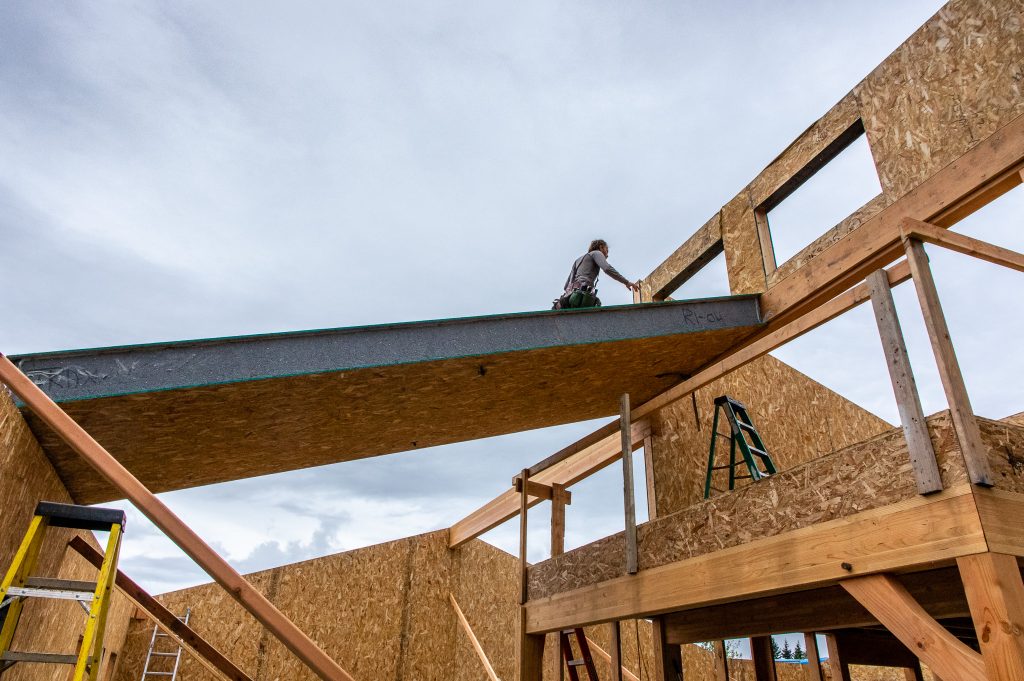
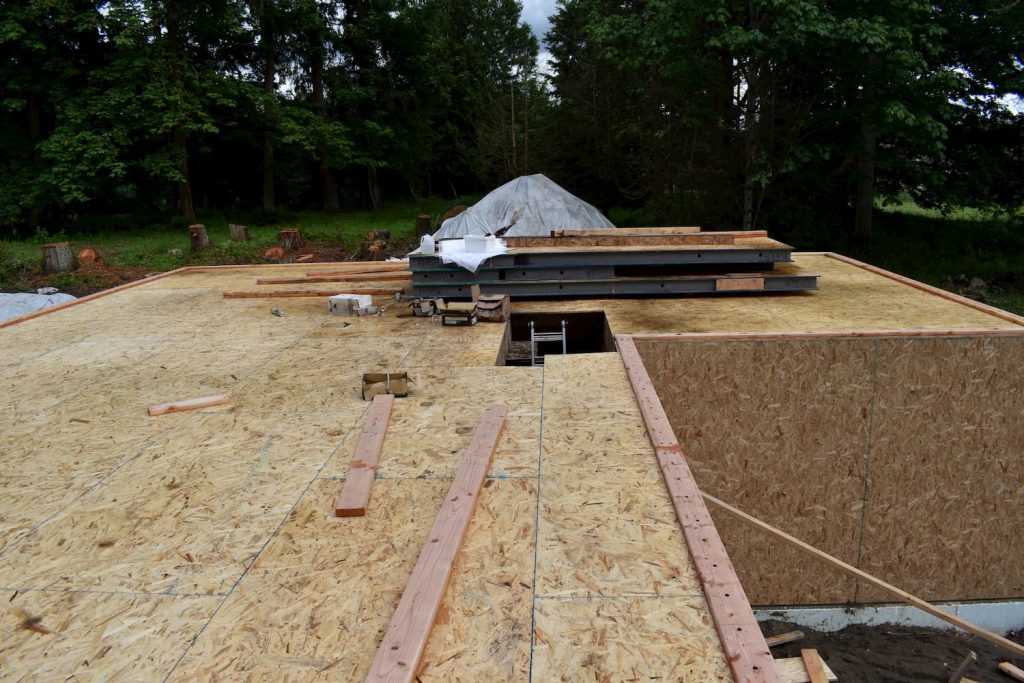
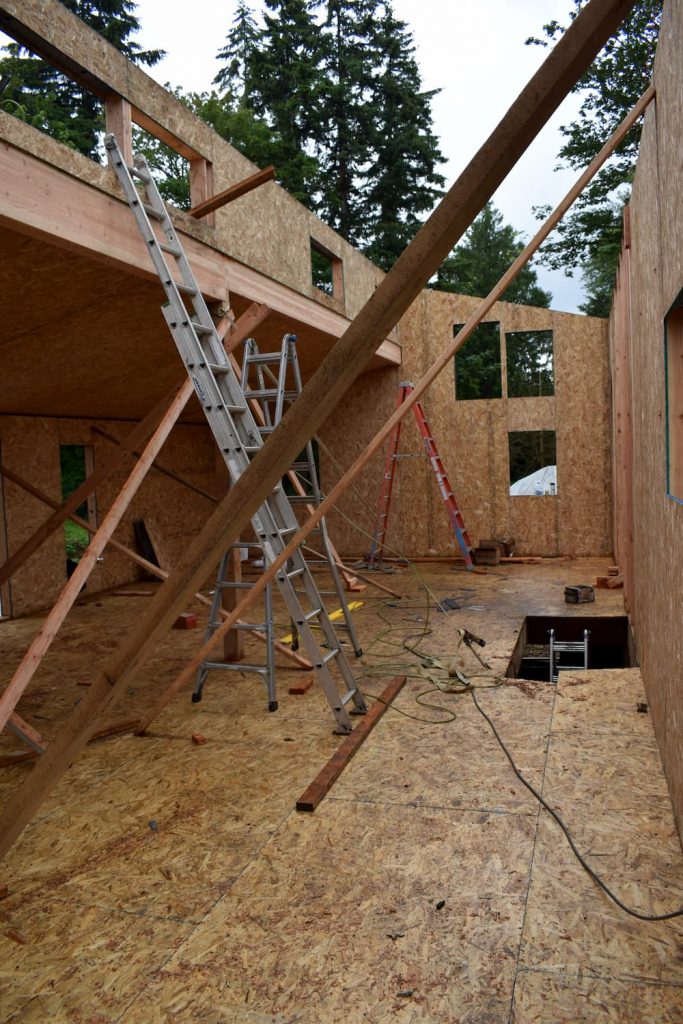
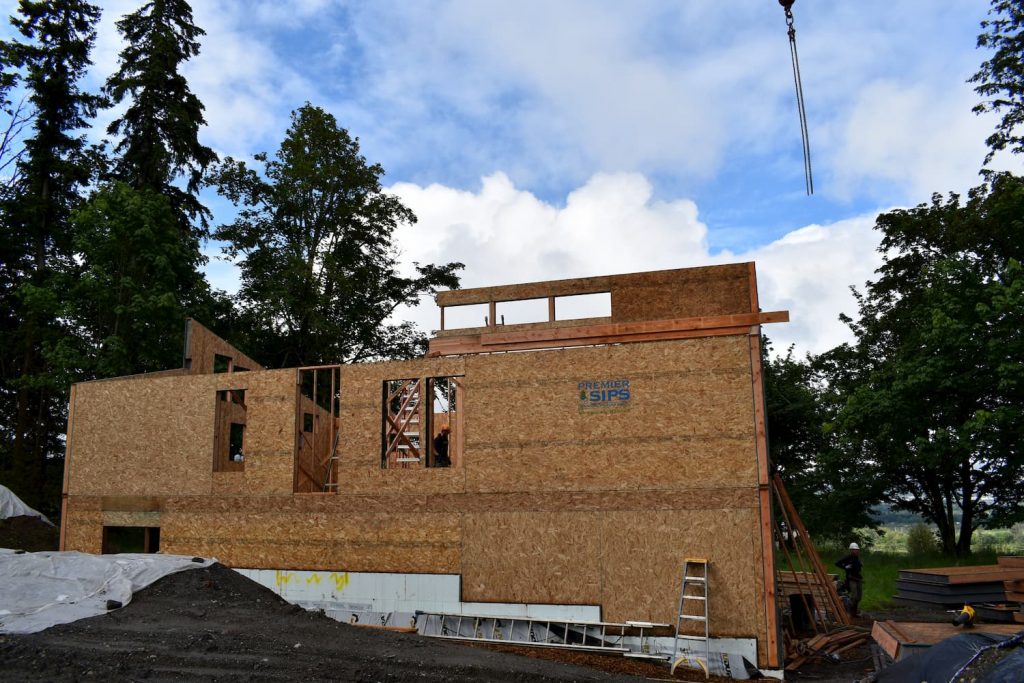
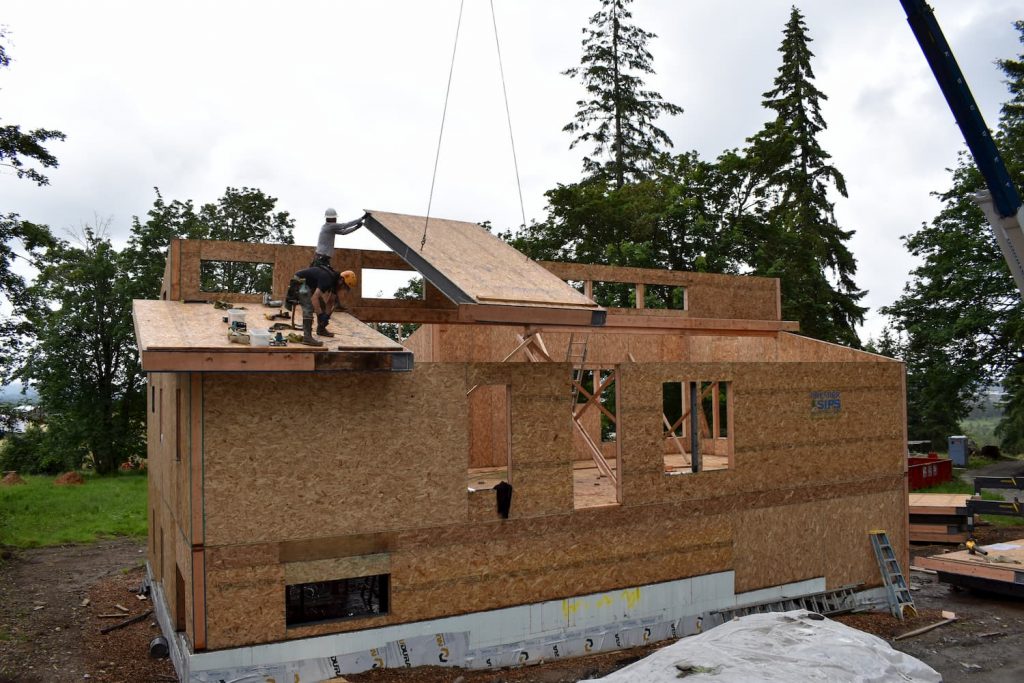
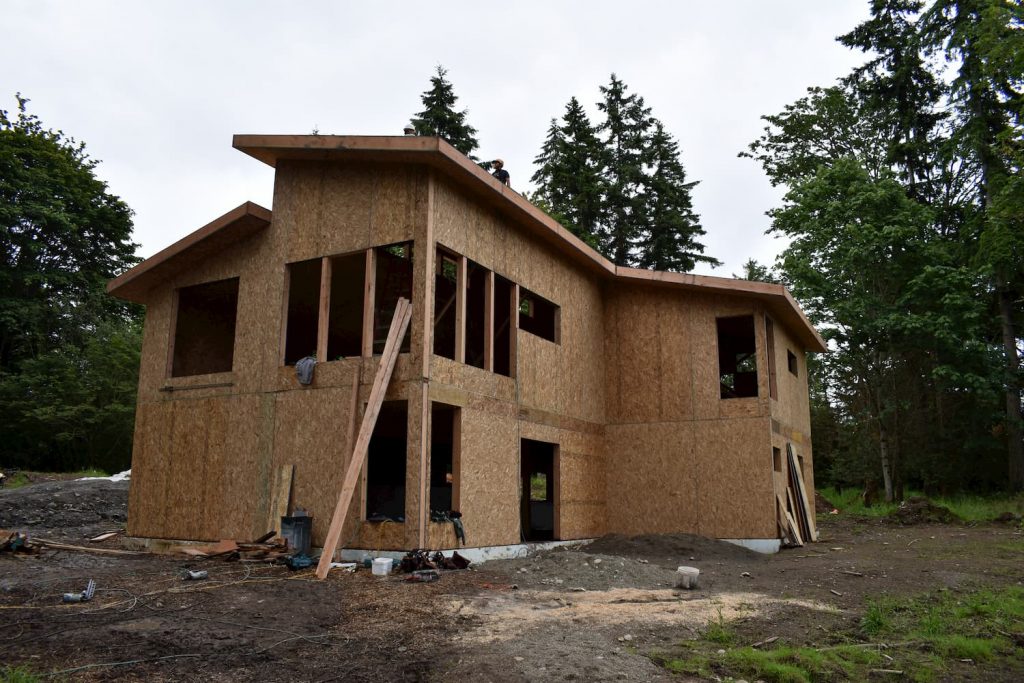
Last week the TC Legend Homes crew finished off the SIPs roof structure on the Lake Stevens house.

On average we take about (2) days to assemble the 1st floor SIP wall panels. We build the 2nd floor-level TJI and sheeting floor system over the succeeding (2) days. The upper level walls take a day or so, and then it’s roof-day!

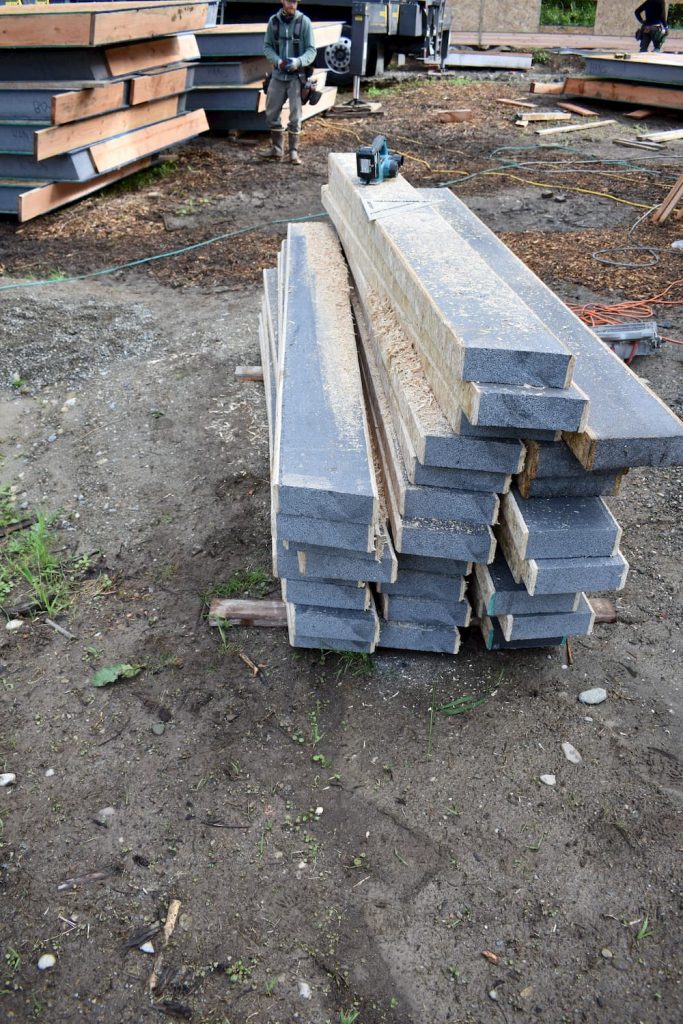
On roof-day the crane arrives early, and the roof panels are rigged, swung up, and screwed in-place by Ted and Norm. The crew have pre-assembled the boundary supports, so we don’t use more crane time and belch more diesel than necessary. The boundary support is a continuous 2x10 that seats into the 1.5” perimeter recess & connects together the outside edge of the roof panels.

SIPs are very fast to assemble and incur almost no waste material onsite because everything arrives pre-cut. Most excess off-cut foam is recycled back into the process during factory fabrication and the Premiere software nests the required panel shapes for maximum efficiency, making Premiere more streamlined, more profitable and more environmentally responsible.

Air sealing is very, very important for energy efficiency.

Imagine a fast, cold wind blowing over the building and all the warm air streaming out through the construction cracks. The Lake Stevens house is modeled to need a maximum of 12,500Btu/ hour to heat in midwinter, if we air-sealed the envelope to 0.6 air-changes per hour. (Note: (1) air-change-per hour assumes the entire volume of the house has the air replaced once within (1) hour).

If we air-sealed the Lake Stevens house to 5.0 air changes per hour, code minimum, we’d need 19,000Btu/h of heating for midwinter! So you can see that air sealing to reduce the air-changes per hour can give over 35% reduction in heating load.

SIPs are a pre-sealed sandwich, and compared to typical construction there are far fewer construction-joints in a SIPs building due to the large SIPs panel size.  The standard SIPs assembly process includes installing beads of specialist mastic to air-seal and adhere the panels to each-other.  SIPs have a measurable dollar advantage with that high level of pre-sealing and easy panel-to-panel air sealing. Meaning you can buy and run a smaller heat pump. And we haven’t yet examined the standard R29 insulation in the equivalent 2x6 wall!

…more in Part 2.

SIPs Structural Insulated Panels


The Benefits of Slab on Grade

The Benefits of Slab on Grade

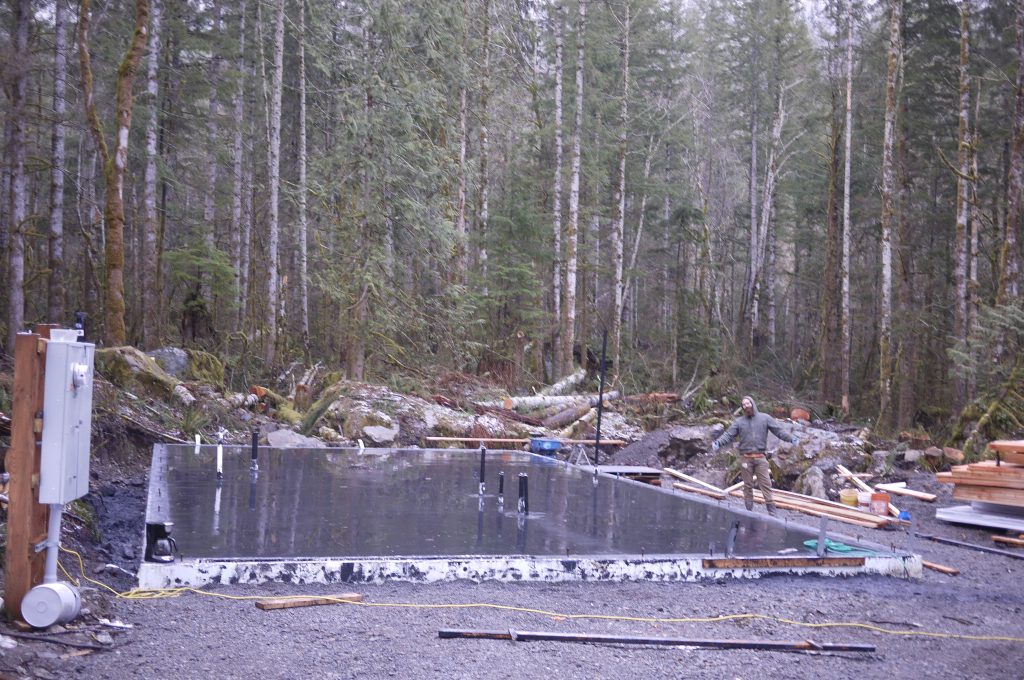
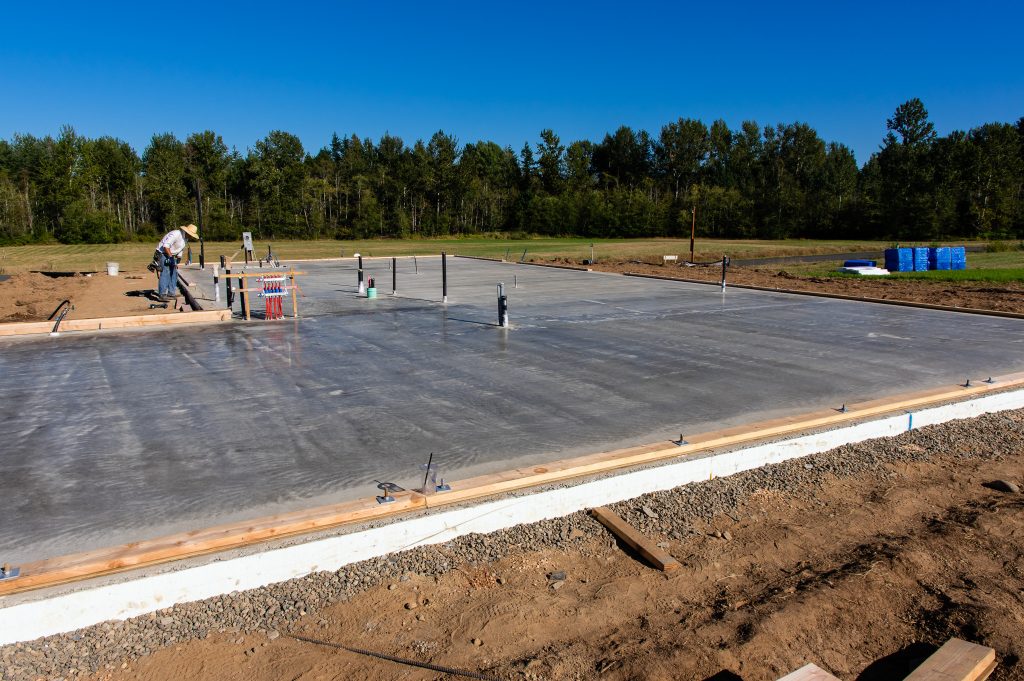
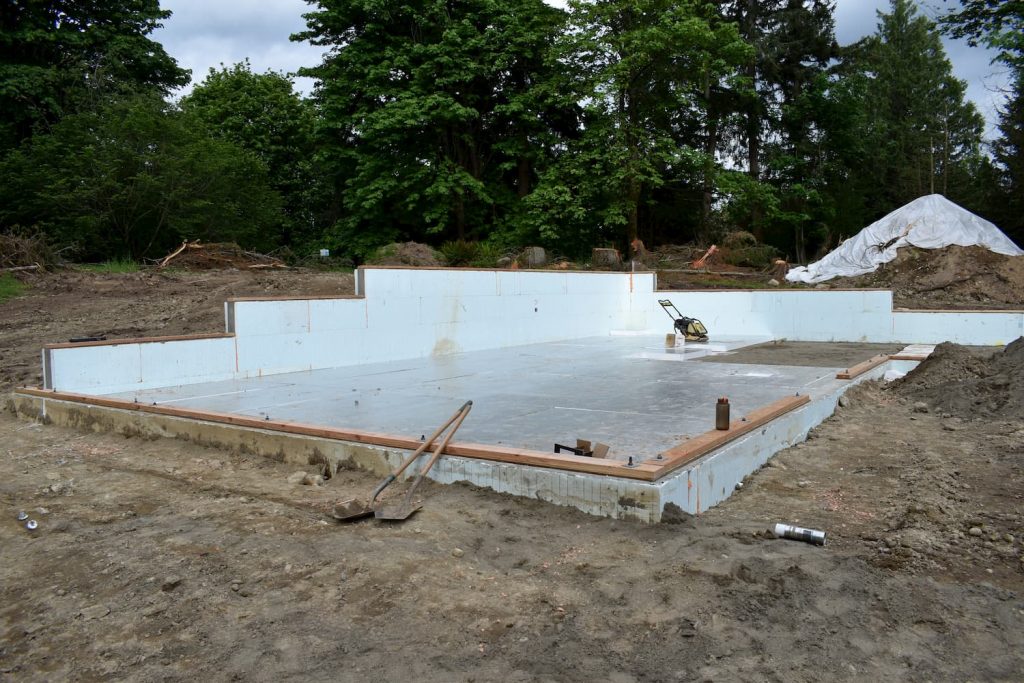
When we pour a slab on grade we are basically pouring concrete directly onto the earth. Sure, there is a 4” layer of foam under the concrete so we don’t lose our heat, and yes, there is 12” of sand under the foam so the foam sits perfectly flat and the plumber can easily locate drainpipes in the sand... but under that sand is the compacted native earth.

No crawl space, rats, trash or mold, just a crisp concrete slab sitting on the earth, insulated so the slab holds in heat (or cold), and keeps the temperature inside the house consistently stable.

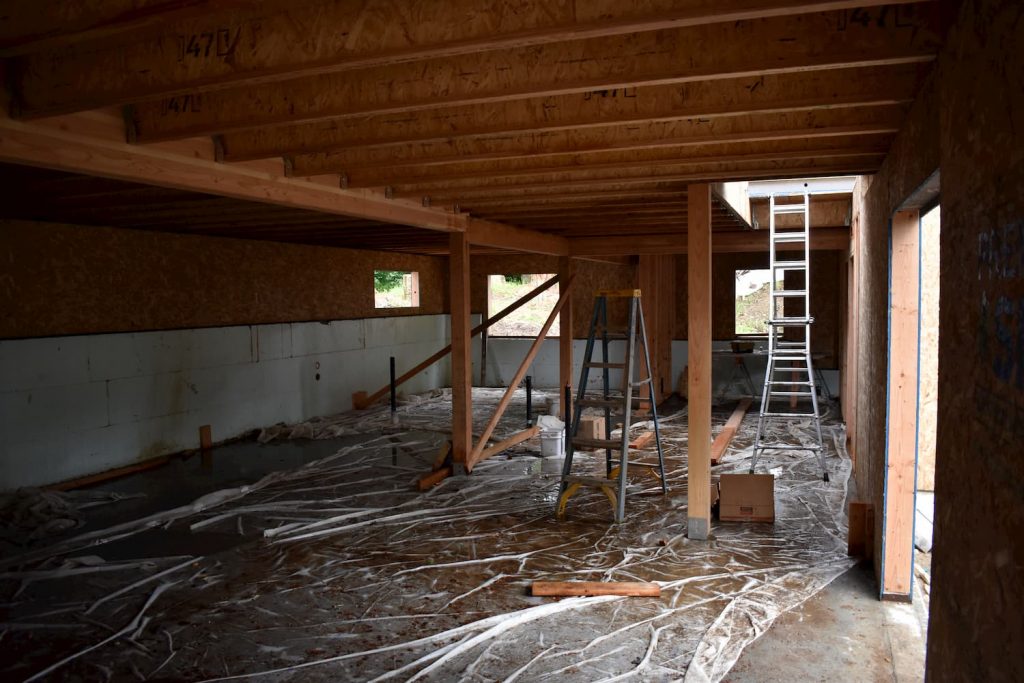
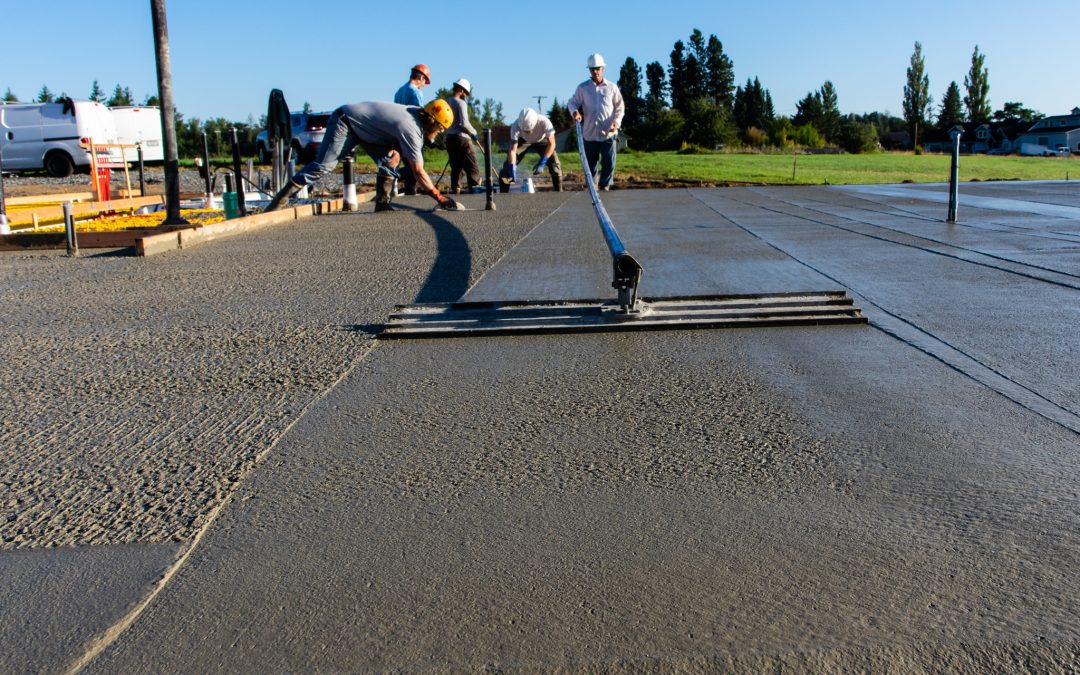
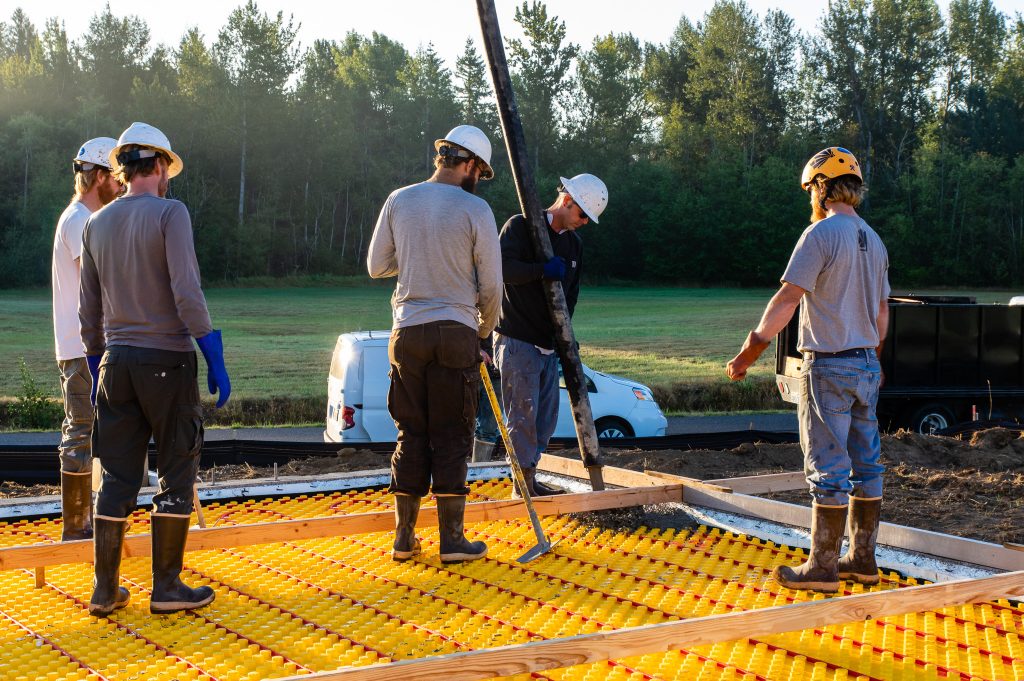
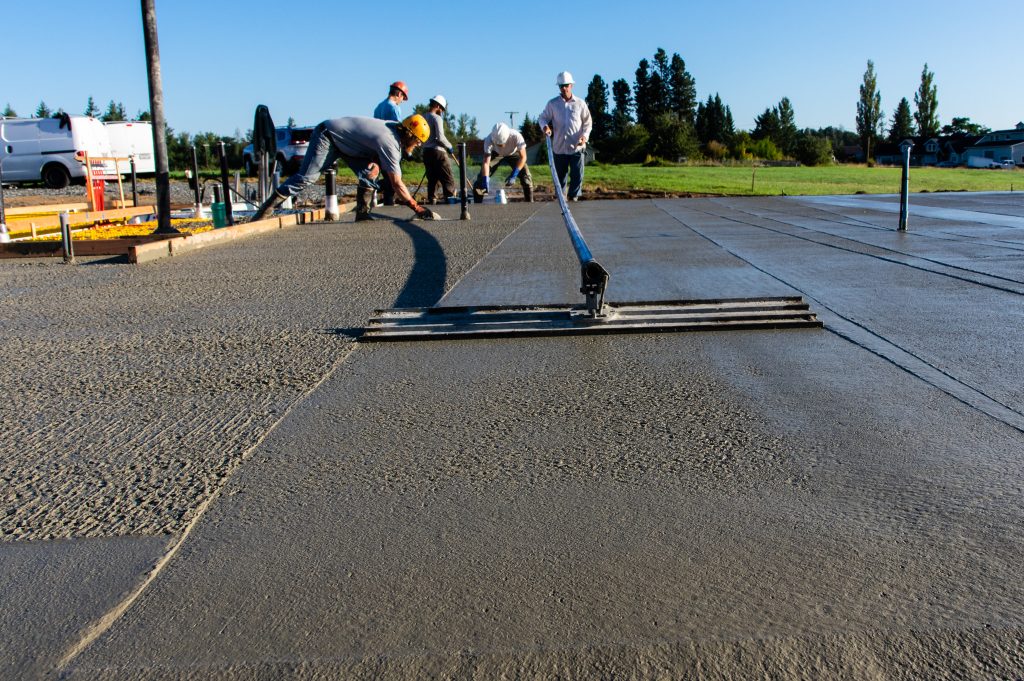
Slab-day is stressful, because many of the affordable Net-Zero houses from TC Legend use the slab-on-grade as the finished-floor.

Concrete slab as a finished floor provides a cost-effective, durable, aesthetically modern floor. However, the concrete needs to be finished perfectly flat on "Slab Day."

Last week at the Lake Stevens house, the second concrete truck was late and the guys had to scramble to pour and screed the last truck-load before a permanent seam became inevitable!

Disaster was fortunately averted, the 1,500 square foot (sf)  floor had the seam massaged-out, was troweled flat, covered in plastic and will be scrubbed and sealed in a few months before the trim goes up.

There are other finish options for concrete floors; they can be ground down, acid etched, and stain can be added to the concrete in the yard.

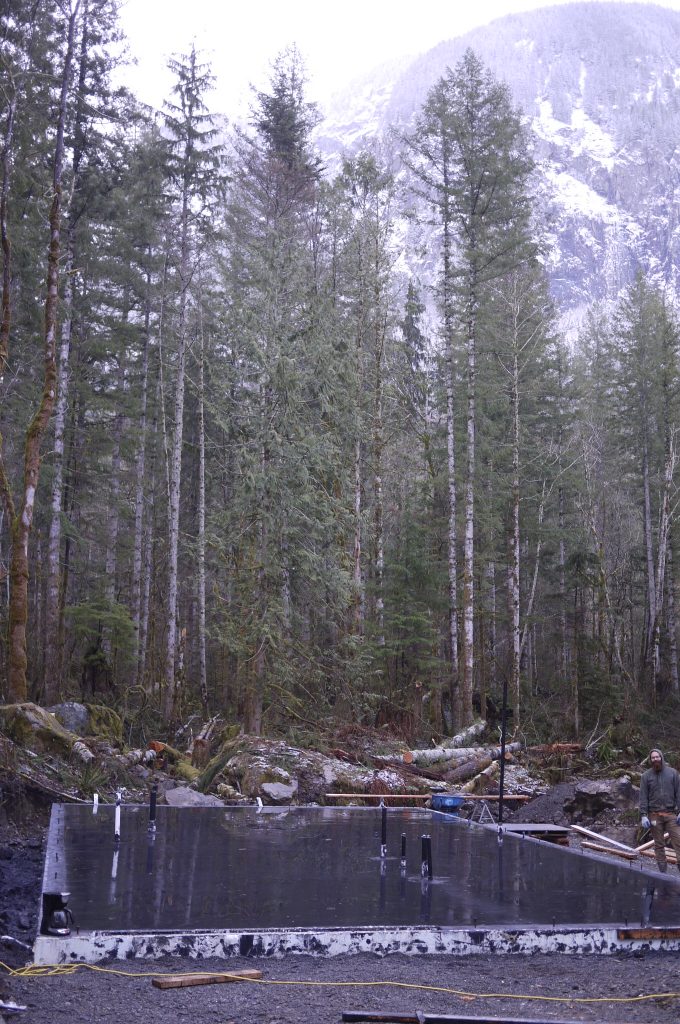
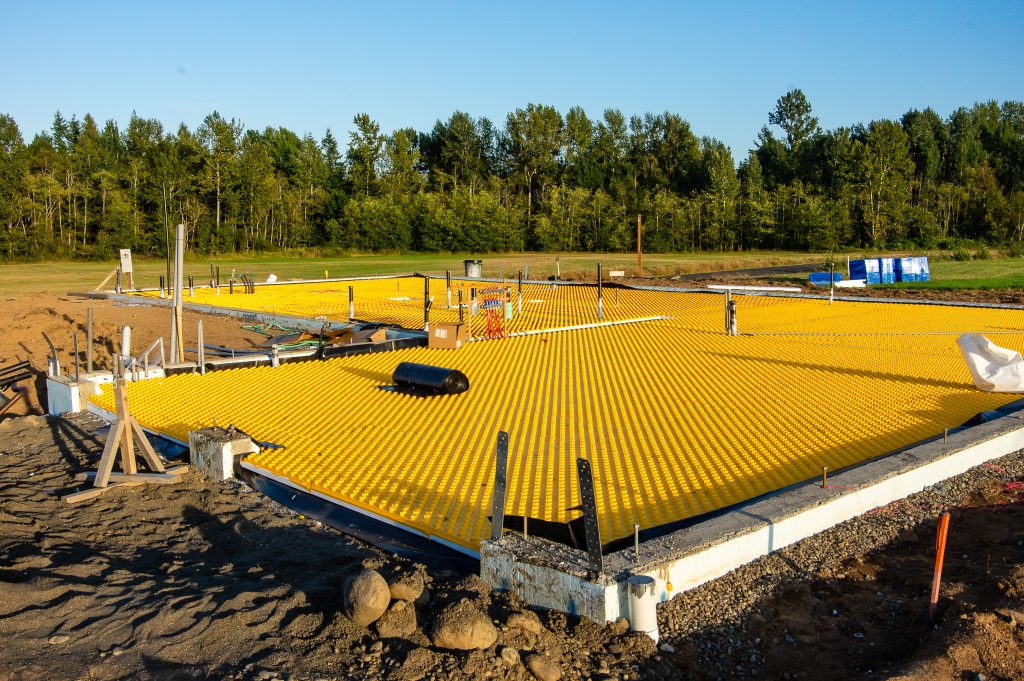
The following photos are gathered from a couple other already-built jobs. Dan was too busy at Lake Stevens last week, shoveling, troweling and de-stressing the crew to run a camera.

The black slab under the mountain was poured using black dye within the concrete.

 The yellow Legos are a layout grid for in-floor radiant hydronic heating, which until recently was one common heating option deployed within our Net-Zero homes (more on heating systems soon).

. 

The Benefits of Insulated Concrete Forms (ICF) Foundations

The Benefits of Insulated Concrete Forms (ICF) Foundations

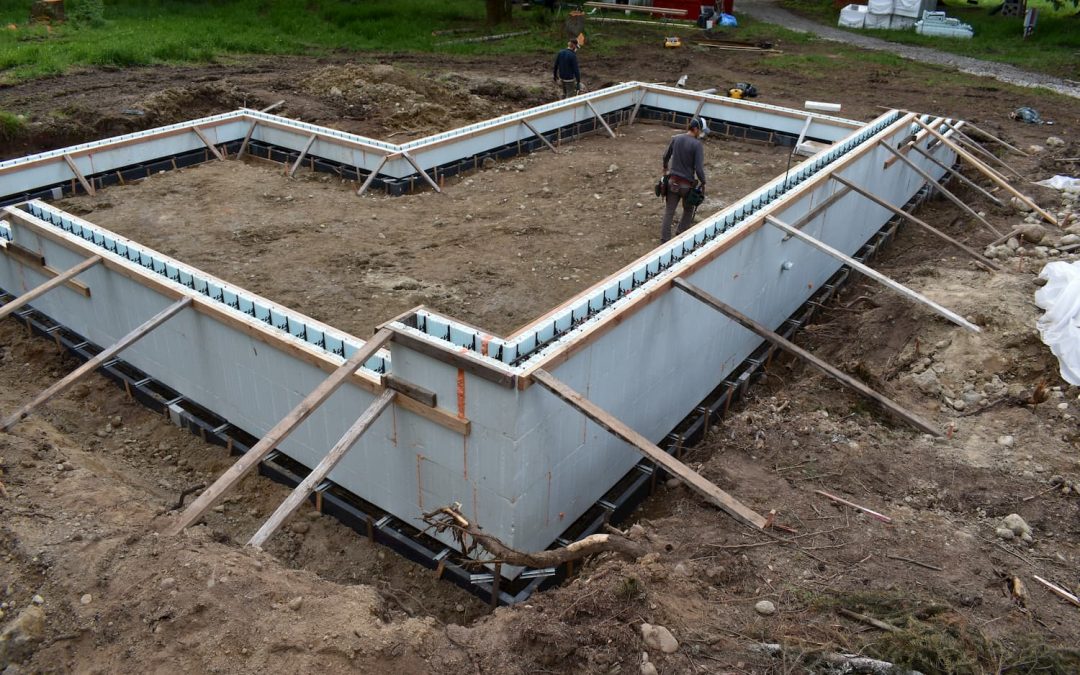
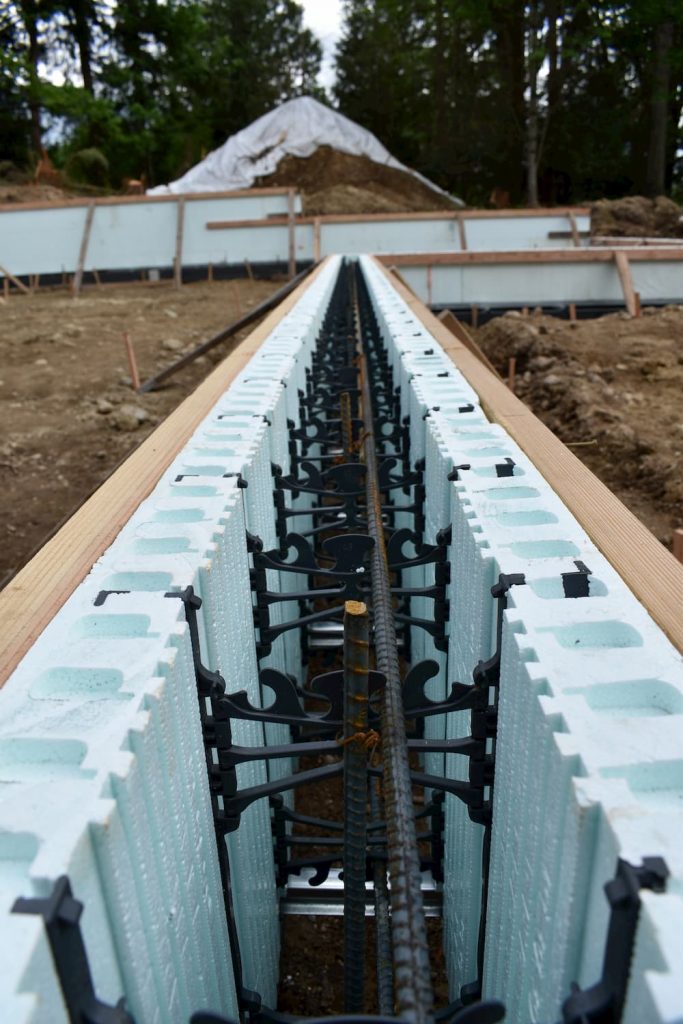
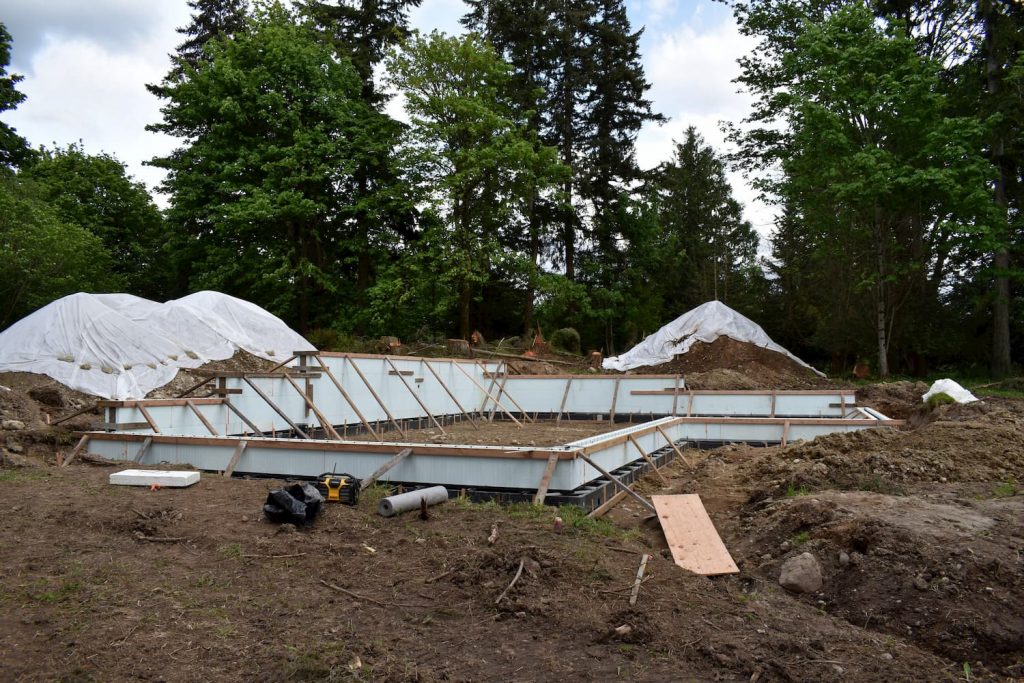
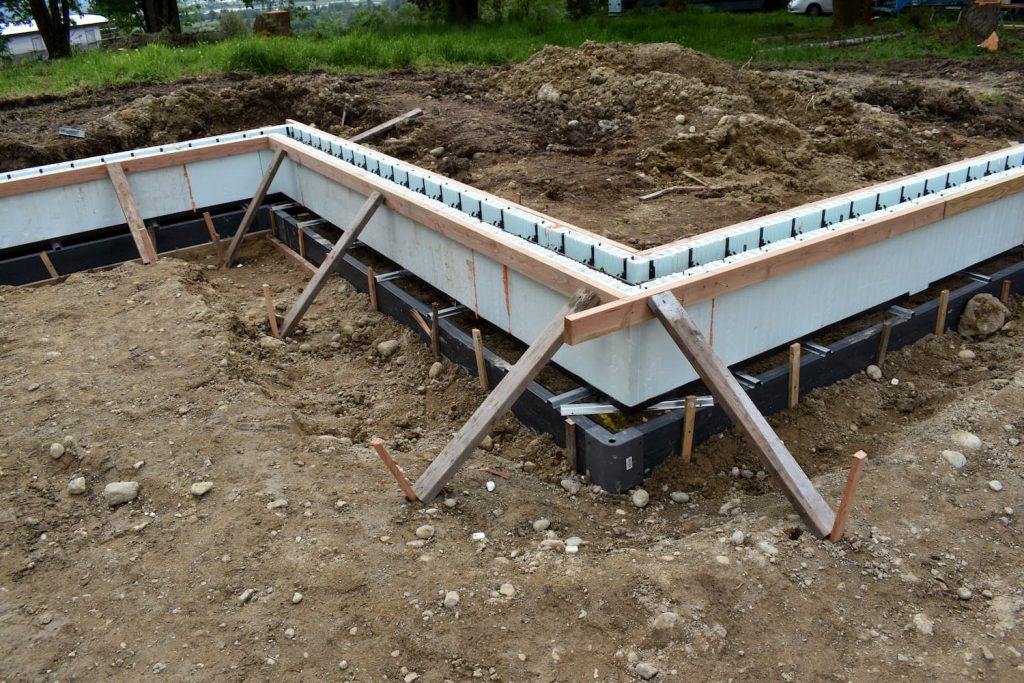
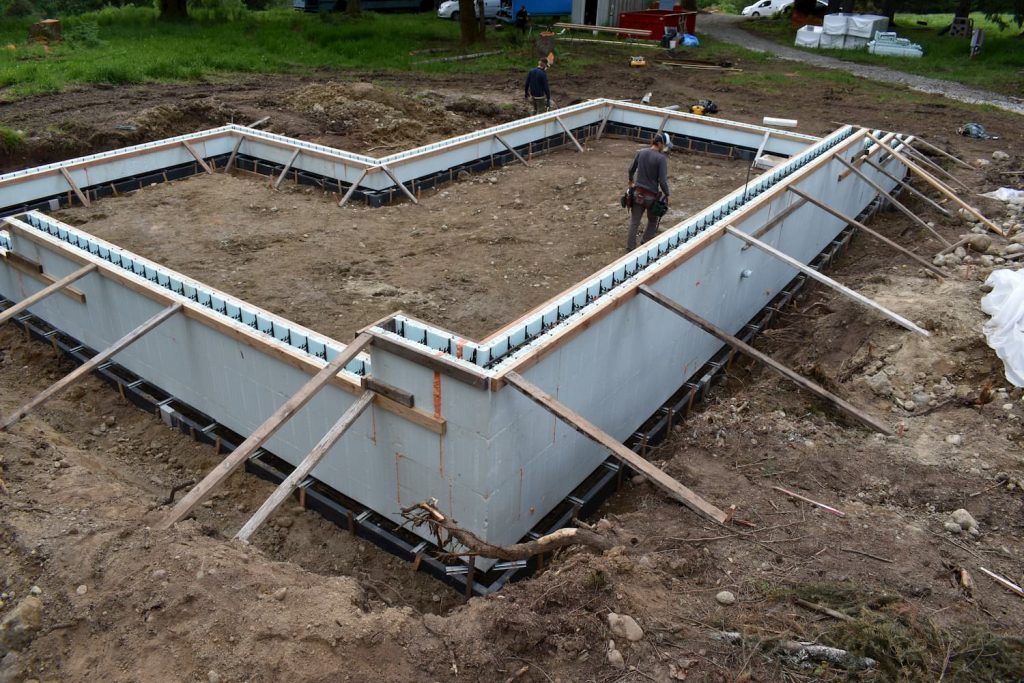
The TC Legend Homes fellas put up the Lake Stevens house's insulated concrete form (ICF) walls in the rain last week over the course of just (2) days! Dan said it went well since the soil had a good consistency to seat the Form-a-Drain footing, and the blocks went up fast, as per usual, since everyone likes stacking up Lego blocks!

A Net-Zero house is insulated on all (6) sides, and TC Legend builds with structural insulated panels (SIPs), so we have R-29 SIPs walls all around, R-49 SIPs roof above, and 4” R-20 foam under the slab-on-grade.

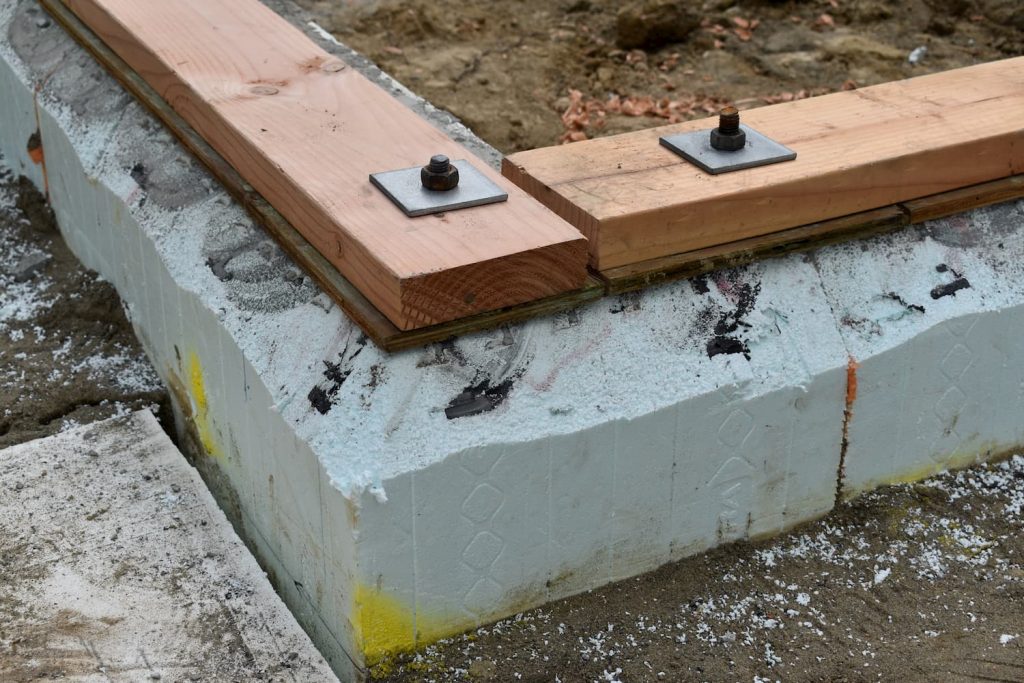
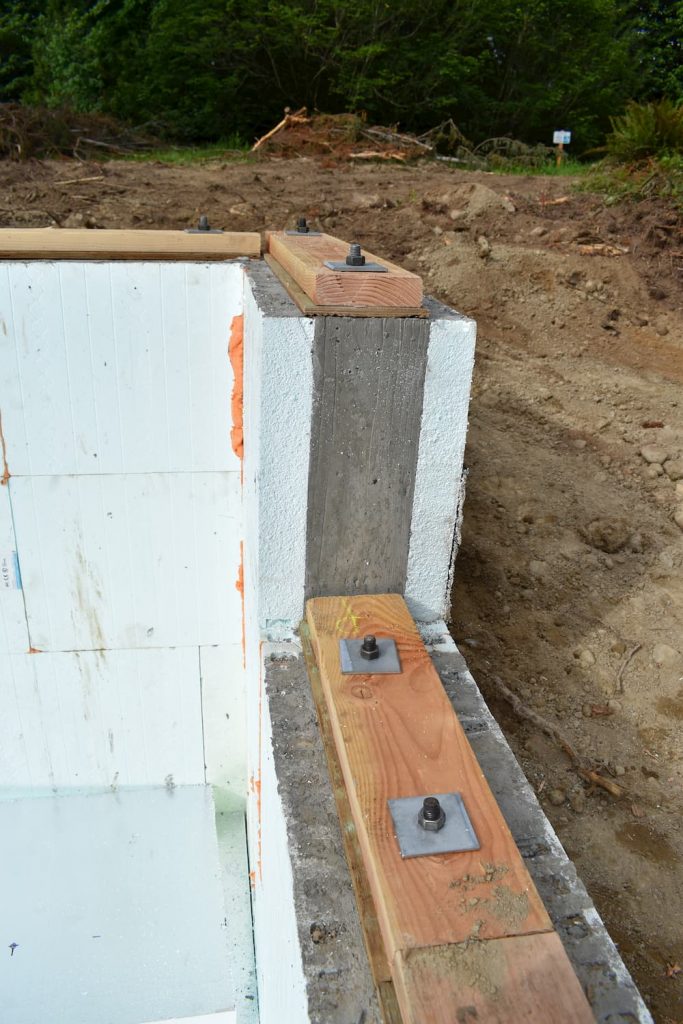
The edge of the slab also needs insulation, otherwise there would be a weak spot and heat would leak out through the slab perimeter, into the stem-walls (which are exposed to the weather).

We solve this problem by pouring the stem-walls into R-24 ICF forms which complete the insulted shell of this affordable Net-Zero home.

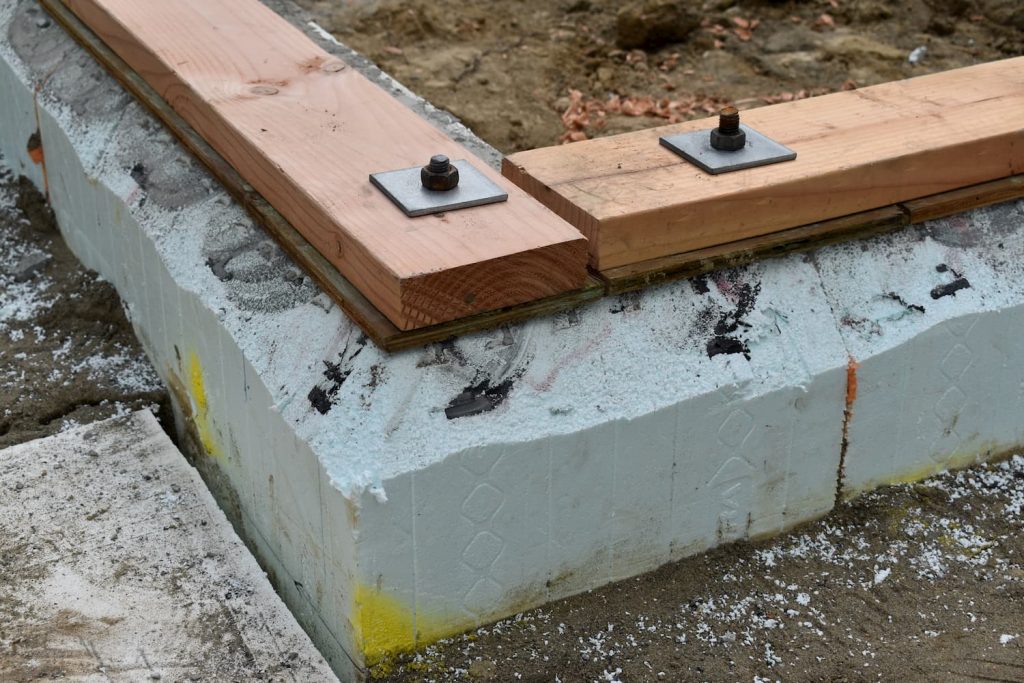
Concrete has been poured into foam wall-forms since the ‘80s. The hollow blocks go together like Legos with the required re-bar clipped inside, and once full of concrete, the Styrofoam block remains in place performing the job of insulation, and containing concrete while wet. The process is fast and clean, and has lower labor costs compared to traditional concrete forming.

We use NuDura R23.8 ICF blocks to form the stem walls, and retaining walls when we need them. The NuDura blocks are great since they concertina-down to transport. ICF blocks are available in many thicknesses with many variants for different construction requirements. We use 6” walls and usually only order inside-corners, outside-corners and 8’ straight blocks. The NuDura blocks have hard plastic structural strips that accept screws for siding and drywall.

The blocks sit atop the hat-channel that spans the footing form. At Lake Stevens we used Form-a-Drain footing form which, like the ICF’s does not need a form-board to be stripped-down after concrete is poured. The Form-a-Drain replaces 8” footer boards, is hollow, and drains water away from the foundation foot.

The Lake Stevens house has a 4’ stepped retaining wall up-slope and NuDura supply a very, very sticky vapor barrier to waterproof the stem-wall. TC Legend  Homes has a metal cap/ cladding system system that wraps the exterior ICF foam from the sill plate downwards below-grade with roofing metal, leaving no visually, or thermally exposed concrete.

ICF’s are great for us! They perform two functions: (1) insulation, and (2) concrete form, they are a smart solution for our thriving Net-Zero, and increasingly Net-Positive SIPs housing in Washington state!

TC Legend Homes: Typical SIPs wall ICF Foundation

 TC Legend Homes: Typical SIPs wall Insulated Concrete Forms (ICF) Foundation

Lake Stevens, Washington SIPs ICF

Lake Stevens, Washington SIPs ICF