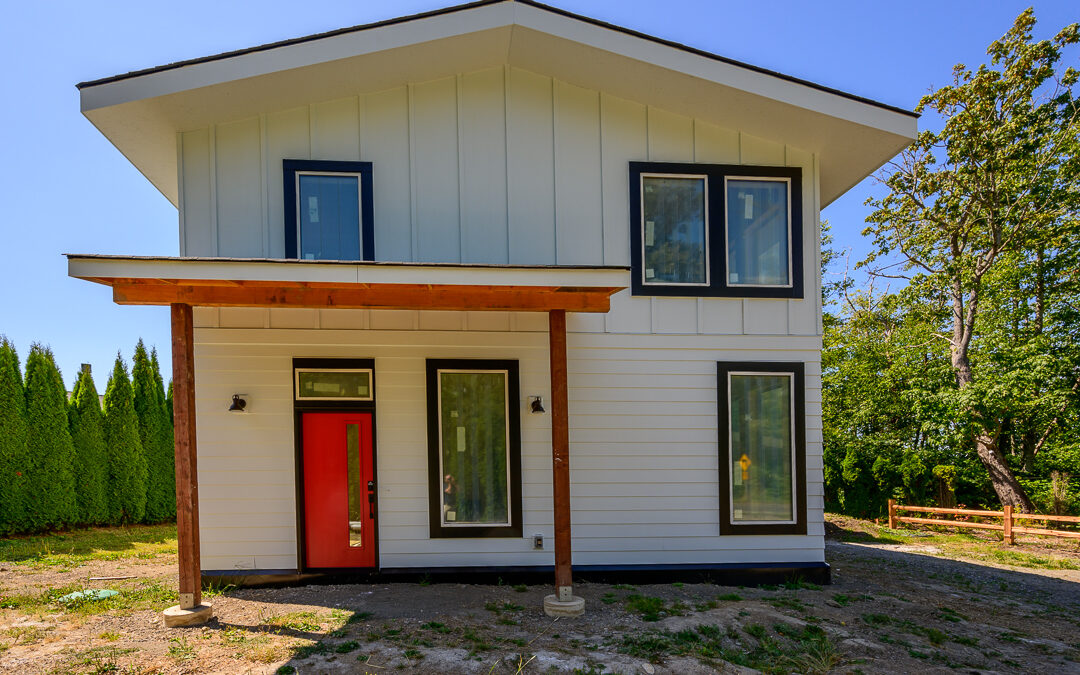
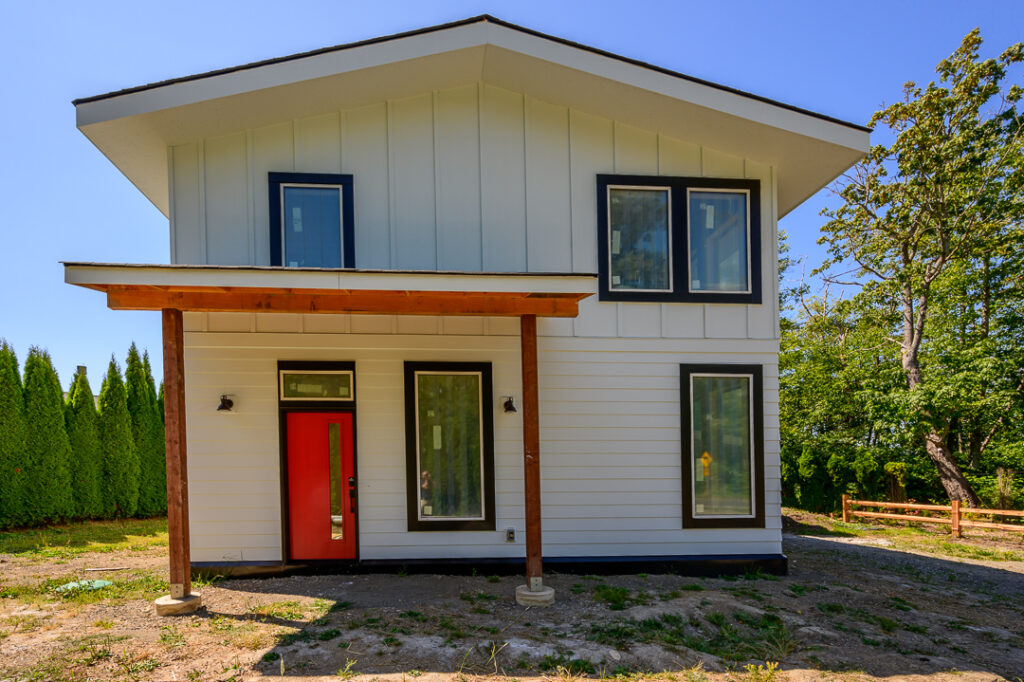
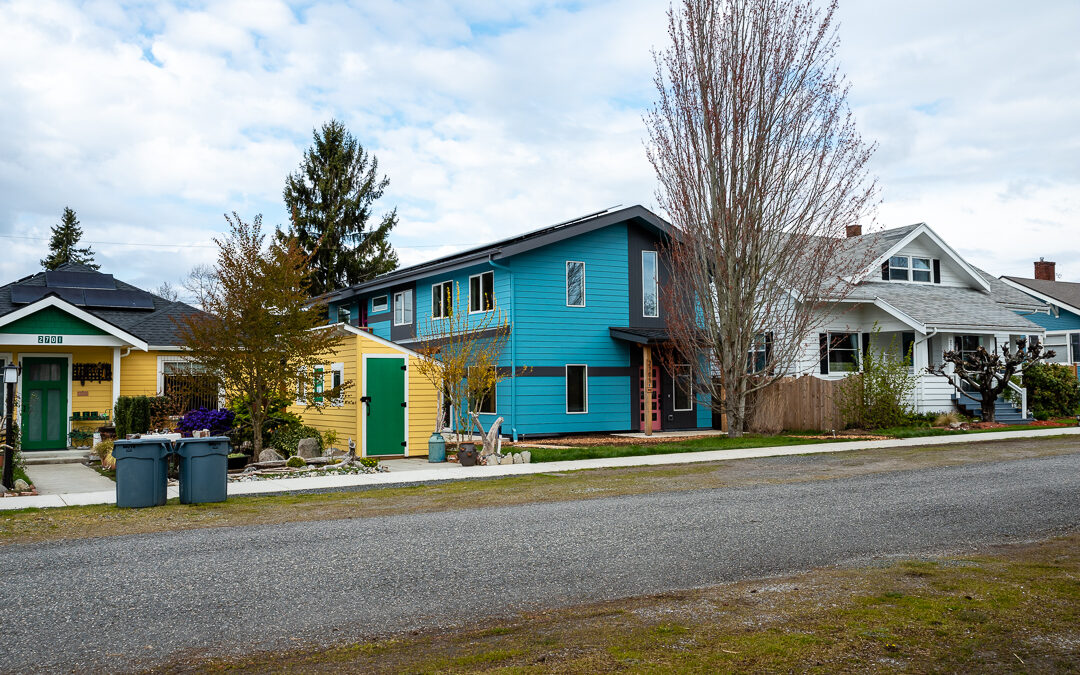
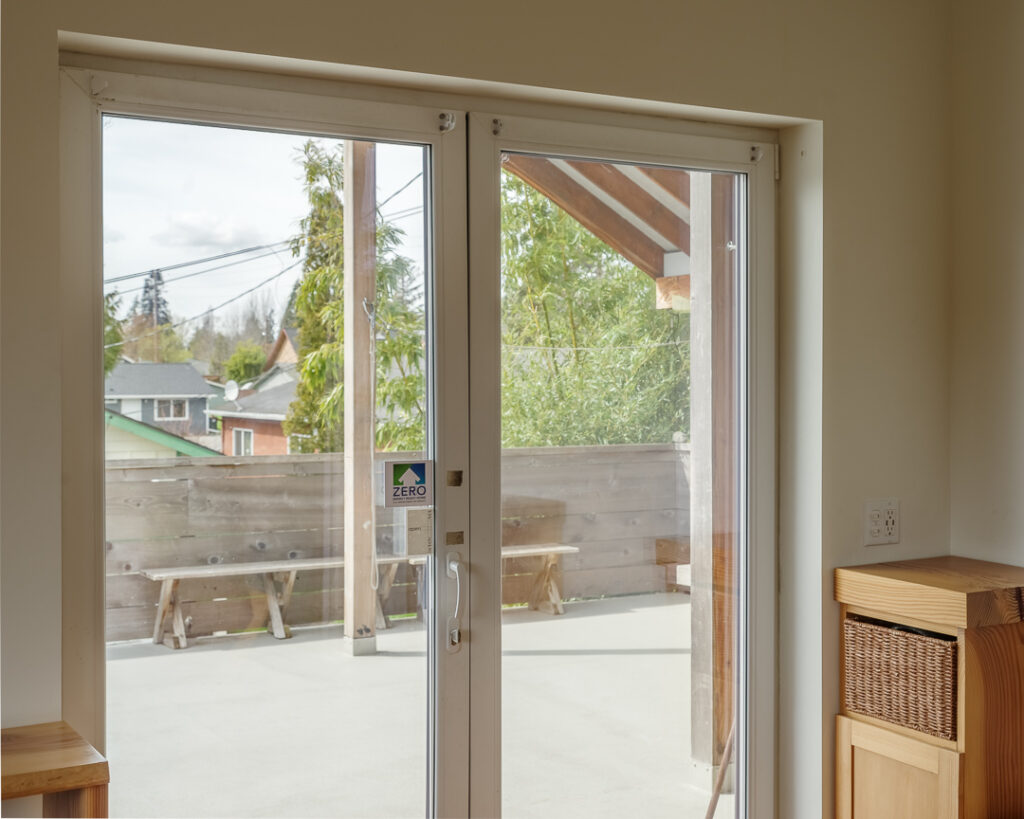
Our Point Whitehorn net-zero home was featured in @TheNorthernLight Blaine & Birch Bay’s Community Newspaper!
“Nestled adjacent to wetlands and with views of Birch Bay State Park, TC Legend Homes’ Point Whitehorn house is not your average house. The home has a 7.2kW photovoltaic system – the conversion of light into electrical energy – and is built in a highly efficient envelope, setting it up to be a net-zero energy house in Birch Bay.”
You can learn about our cost-saving measures and design challenges by reading the full article online >> HERE <<
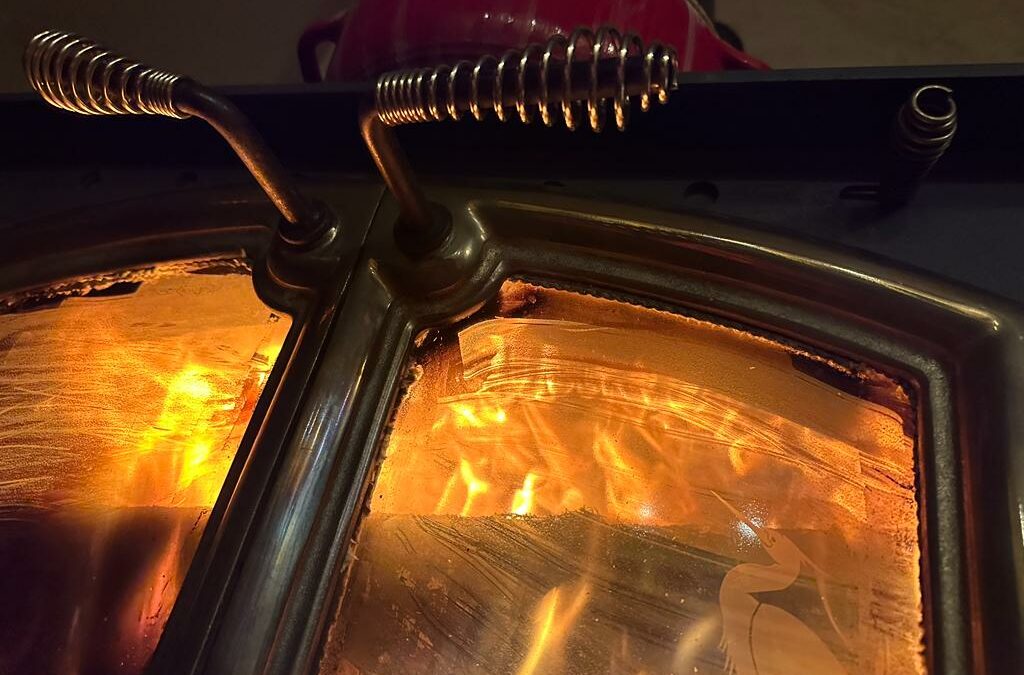
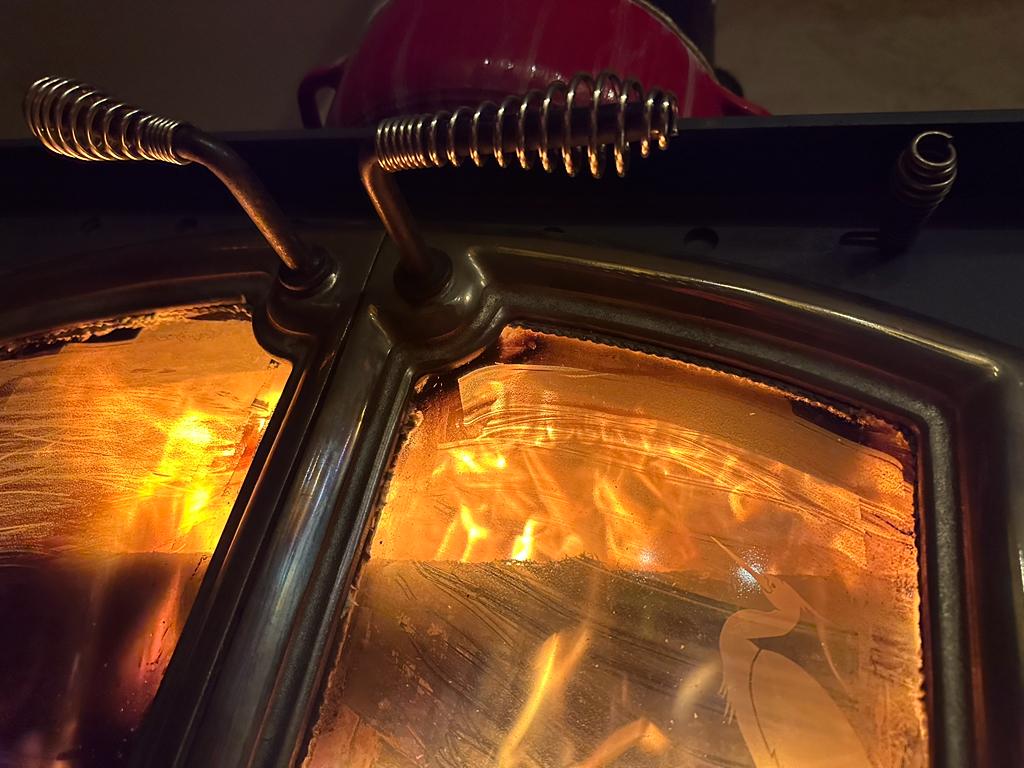
Last month Dan did some surgery on Norm’s reclaimed woodstove he got from his in-laws beach cabin, giving it a secondary combustion manifold using outside air.
The idea is to make it burn the gasses released by the wood that conventional stoves waste.
Dan says, “We put in an air supply line piped from the outside to feed the fire so the fire isn’t pulling the warm air from the house’s envelope which helps retain warmth.”
“That air supply then feeds into a manifold overtop of the fire. Dozens of little holes were drilled into a steel tubing manifold I built to spread air out through the stove. A smaller air supply splits off from the manifold at the bottom of the stove, runs across the bottom and to the front of the stove to assist with convection and combustion. Norm will then lines the walls of the stove with firebricks.”
What’s the point of doing all this??
So this fire could burn hotter and more efficiently! 🔥
Norm reports back post-retrofit saying that “the wood stove system is working perfectly! It probably cleans the smoke up to maybe 50 percent, and burns the gasses out of the emissions as well as increasing efficiency of the burn within the burn chamber – increasing the efficiency from about 80 percent to 95 percent!”
( SO cool! )
Norm continued to say, “You can tell it is a clean burn because the glass stays clean and you have a really cool fire. The actual flame in the stove comes not just from the bottom, but it shoots down from the top – making it a really cool flame from both directions, but it’s not overly hot!”
📸 Thanks Norm & Dan for sharing your “sustainability” weekend adventures and photos of your project! 😀
TC Legend Homes has been recognized by the U.S. Environmental Protection Agency as a 2023 Indoor airPLUS Leader Award winner for our ongoing commitment to building homes with improved indoor air quality through participation in the Indoor airPLUS program.
“Congratulations to all 14 2023 Indoor airPLUS Leader Award winners!” said David Rowson, Director of EPA’s Indoor Environments Division.
“It is always inspiring to have the opportunity to recognize the incredible work that our partners do every day, from expanding the use of Indoor airPLUS on a national scale, to maintaining strong leadership within their local communities. On behalf of EPA and the Indoor airPLUS team, we would like to congratulate and thank the 2023 Indoor airPLUS Leader Award winners for all of their work in constructing healthier homes for the American consumer”.
This annual award recognizes market-leading organizations who promote safer, healthier, and more comfortable indoor environments by participating in the Inoor airPLUS program.
To learn more about the 2023 Indoor airPLUS Awards and the Indoor airPLUS Program, visit www.epa.gov/indoorairplus
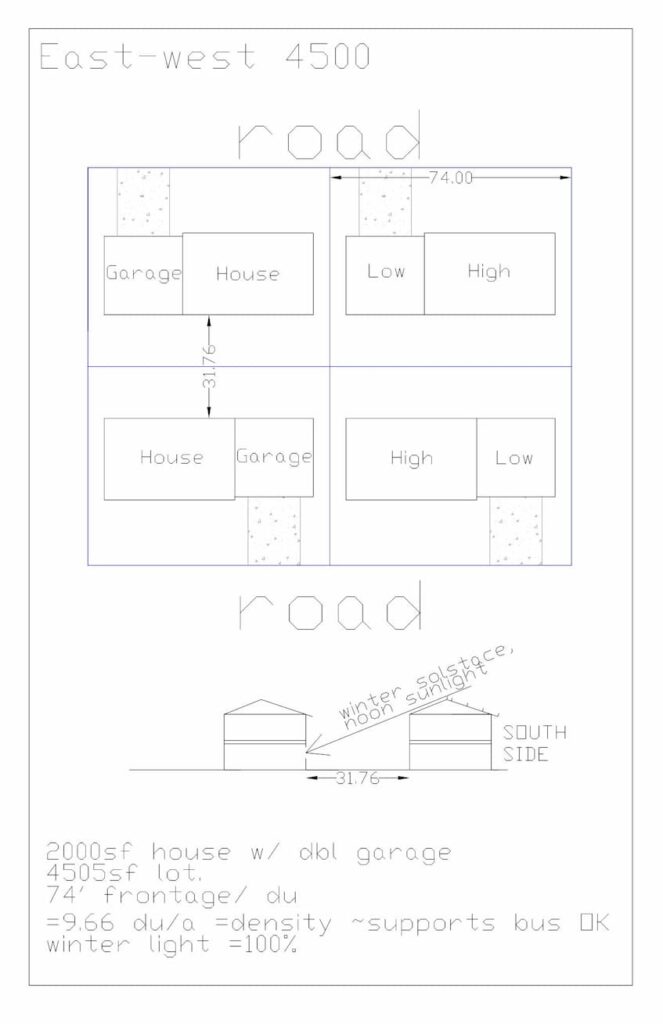
Which way do you run the streets to maximize solar exposure for dense Net Zero development?
Common wisdom states that the optimal streets run east west, which makes sense if you’re the house on the north side of the street, because there’s nothing shading your house, garden or solar panels. However, living on the south side of the street, you suffer from north facing gardens and probably some shading unless the lots are 5000sf or greater.
Critically, 10 dwelling units (du) per acre is the density with enough inhabitants to support a bus service (*1), a key part of the sustainable urbanist vision for transit, pedestrian & bike use, rather than private cars. An acre is 43500sf.
My conclusion is that the common wisdom is wrong for dense, Net Zero development, that the streets should run north-south.
A Net-Zero house has most of the windows on the south side of the house because south facing windows can be effectively shaded from summertime overheating, and can harvest wintertime solar energy.
Because all the windows are on the south walls, we can’t have another 2-story house immediately to the south as shown in ‘East-West 3700’ below, or the valuable direct wintertime sunlight will be prevented from entering & you’ll have a house that is gloomy all winter.
Sure, if the lots are big, we can keep the southern house away, as shown in ‘East-West 4500’ below, but then we end up with less than 10 du/ acre (du/a) and there’s no bus & everyone’s driving cars.
The ‘North-South 3800’ drawing below shows a 1-story neighbor garage to the south, avoiding shade. Bingo! That’s a 3800sf lot, and offers 11.34 du/a. Additionally the frontage length is reduced which lowers roadway & utility development costs.
(*1) Transit modes related to residential density (Boris Pushkarev & Jeffry M Zupan)
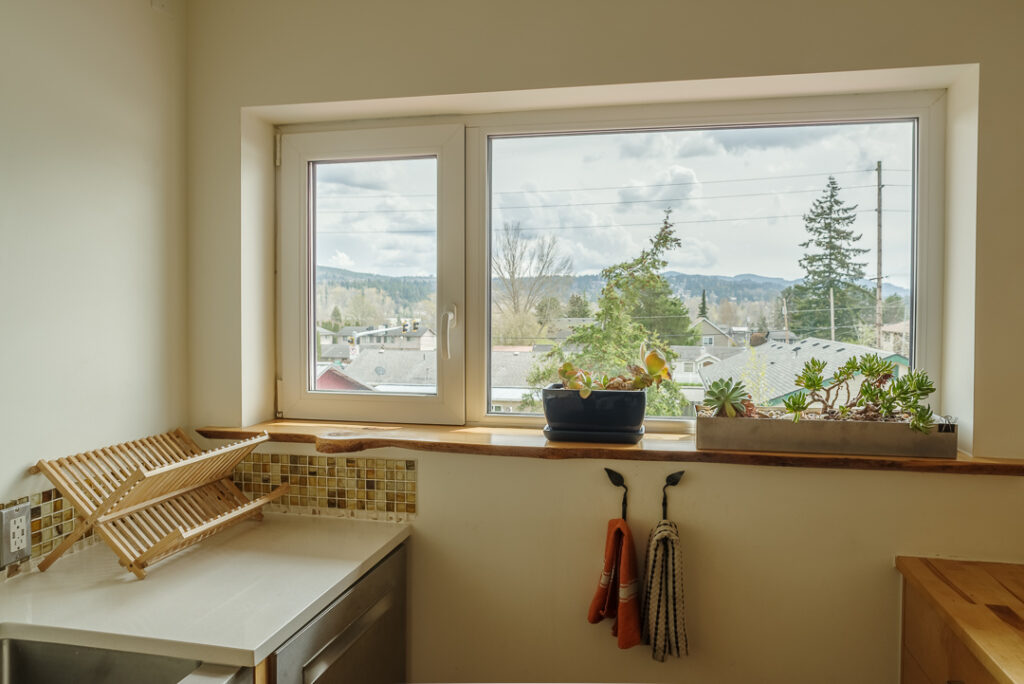
There’s a right & a wrong way to design windows on the southside of a house.
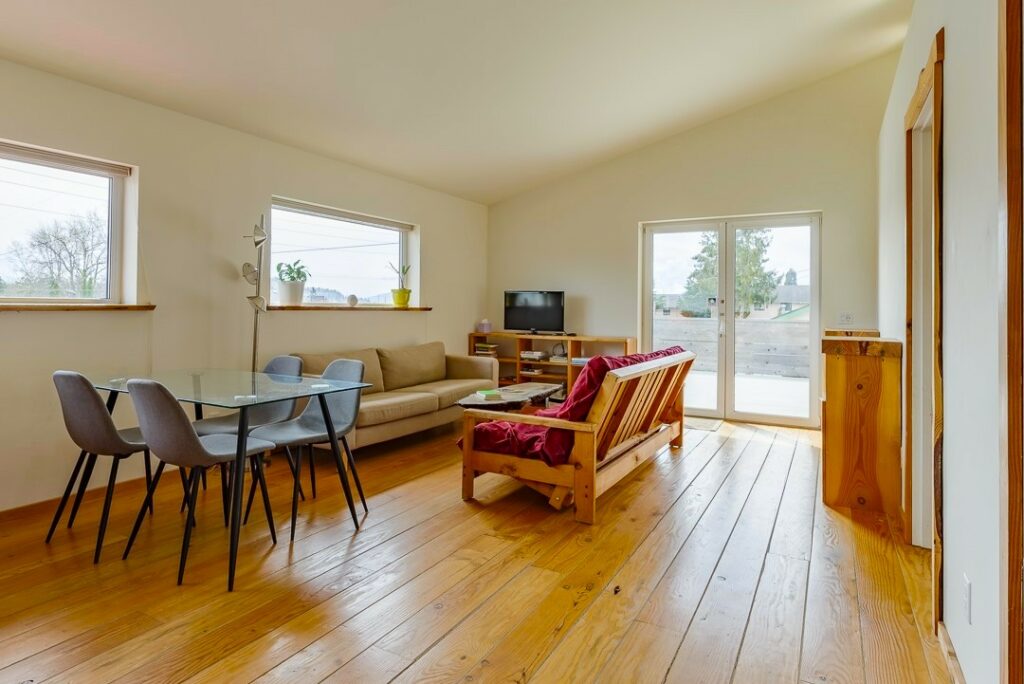
The Murphy windows are done the right way, are a bit high, tucked up towards the eaves to admit the low winter sunshine yet shade-out the unwanted high summer sun so it can’t enter the building & warm up the interior.
This means your windows are a bit high and look to the sky.
I battled Ted for years about these windows because I want houses to look at the ground, and, the sky. However after twelve months looking at the ever-changing sky of the Pacific Northwest I am a convert, and a disciple. It’s just fabulous walking into a cool house in hot high summer, knowing that absolutely no sunshine is entering.
In the summer I want to live in a cool, dark cave. In the howling winter I want to live in a bright, warm sanctuary.
The Murphy house brings this contradiction to life, and then adds space to time:
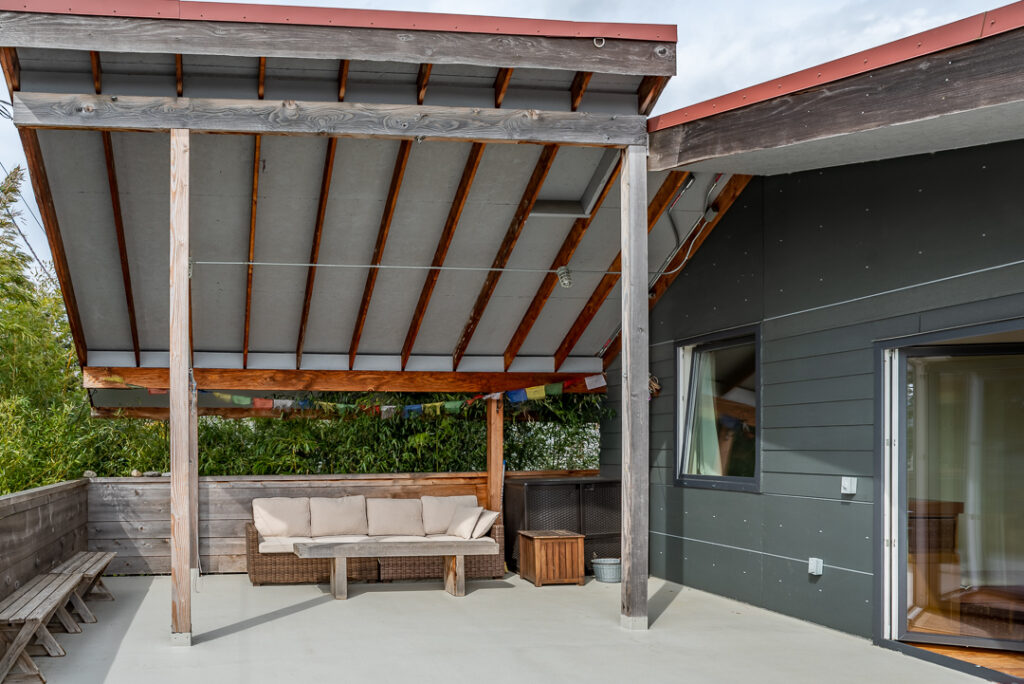
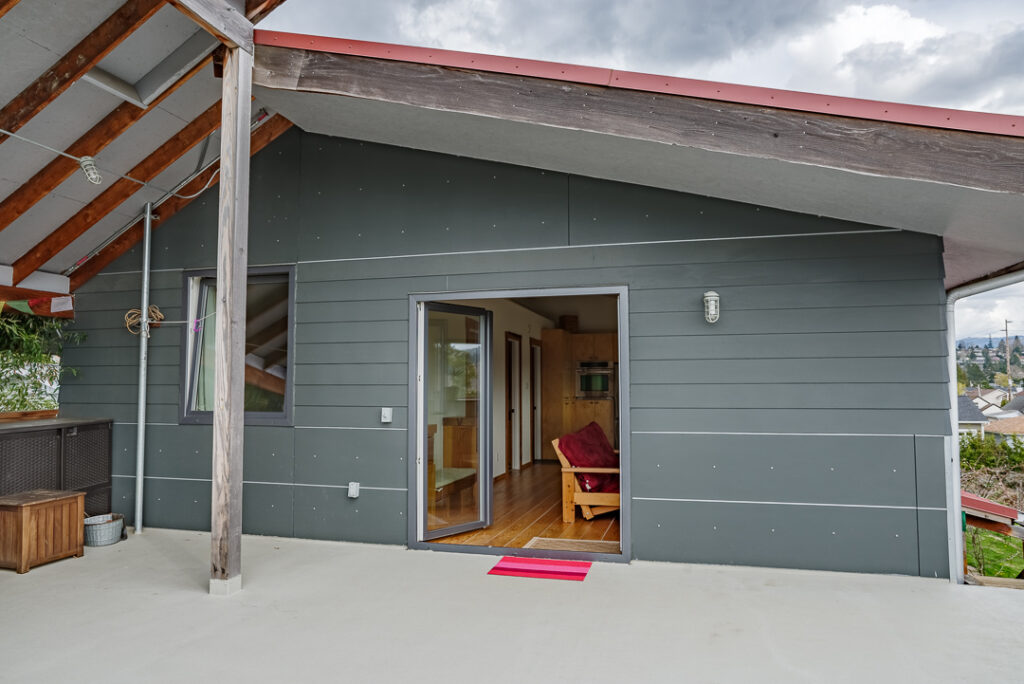
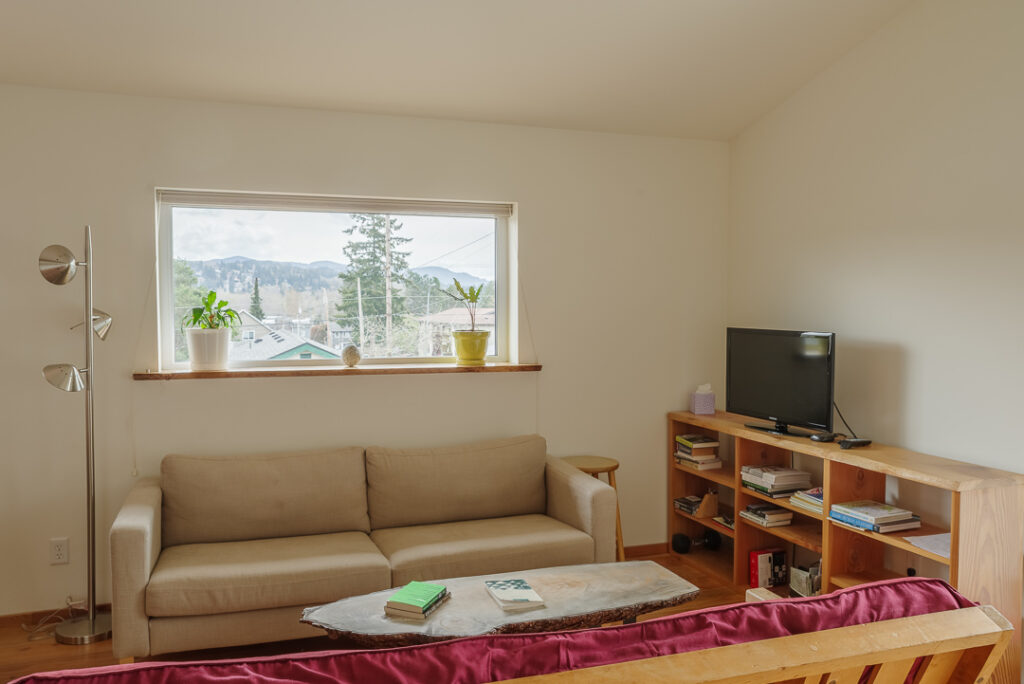
There is 750 square feet of space inside the Murphy house, and there is 600sf of deck-space outside. The two spaces flow easily into each other. How, why, what?
You walk out onto a very modern pale-colored interior-style floor. It feels clean, like a room that’s outside, rather than a deck. Indeed I used to vacuum that floor with the shop vac, and it came up trim with the clean-house feeling. Add good exterior furniture and a partial roof, lights and pots growing peppers in the sunshine & you have a place to go, even it’s just to water the peppers. Now I’m drifting in and out, and out and in. Stimulation outside, sanctuary inside. I move between the two feeding my appetites and resting.
As my life progressed from summer into winter I was left inside again, with those three sky-windows pointing up, but now I was looking at dark sky, stars, tungsten-lit clouds and tungsten-lit storms. The Murphy house was flooded with ambient night-light. Planet earth travelling around the sun is tilted, and the Pacific Northwest was at its distance-extreme from the sun; dark & cold, & I knew it.
Here’s the secret: if you put the windows above chest height you don’t need shades for privacy because there’s nothing to see except a head. So now there can always be a view out, so you can see it all.
I’m not sure it’s reasonable to write a whole post about 3 windows and a deck, but that’s really where it’s at.
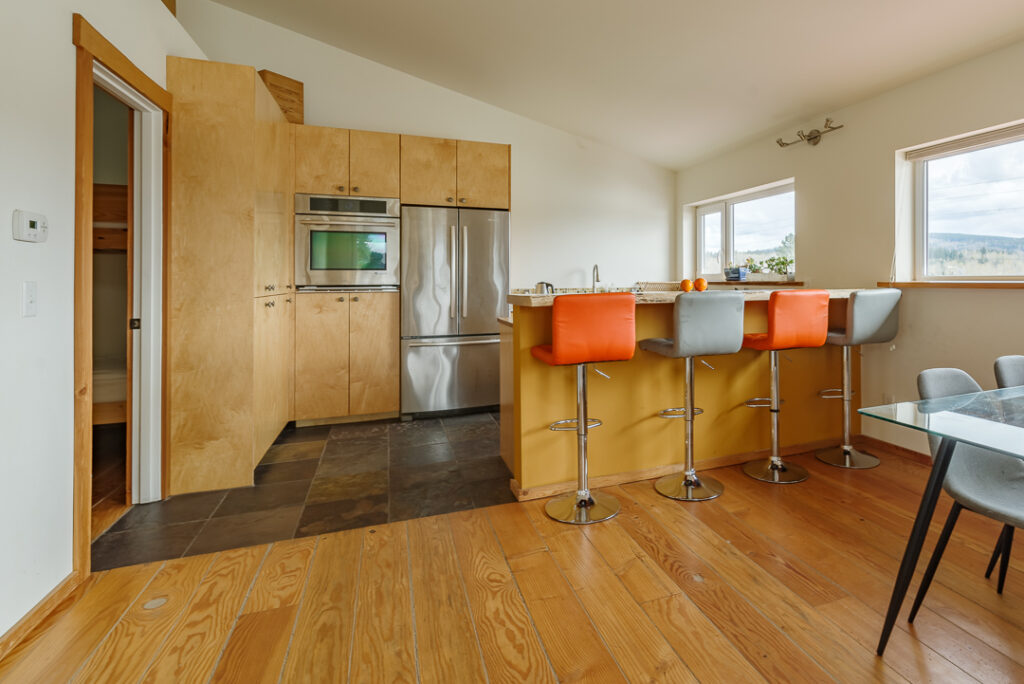
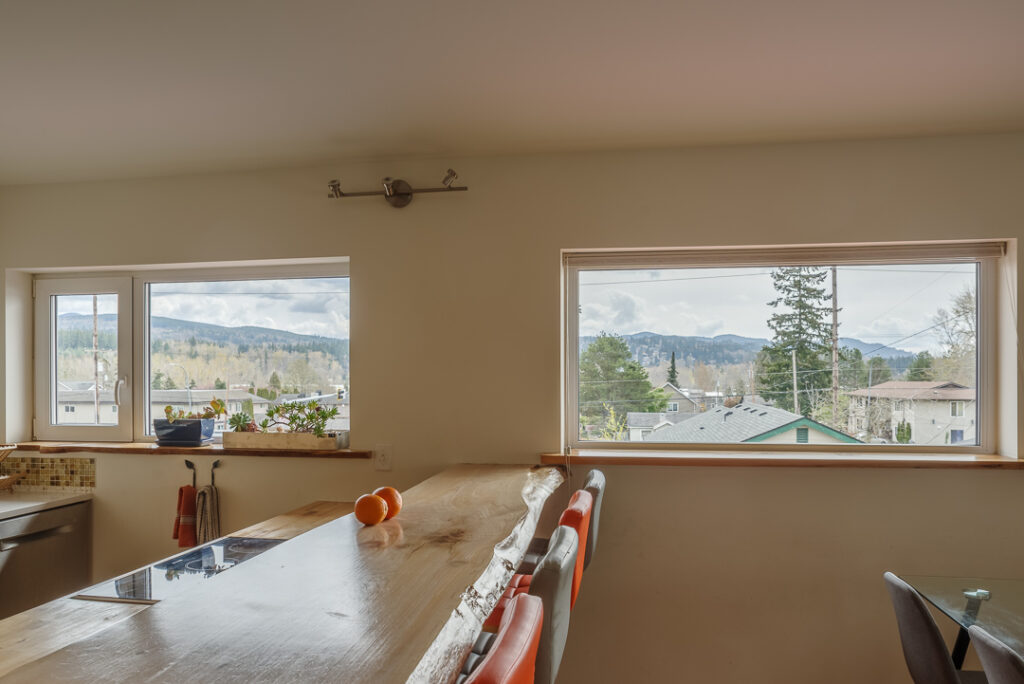
The kitchen is worthy of mention because it formed an epic super-social axis around which I could meet new people; I would cook, and all these new dudes would sit at the bar. I think the concept of ‘defensible space’ bluntly describes how the kitchen/ counter combo lent me ease and accommodated new minds.
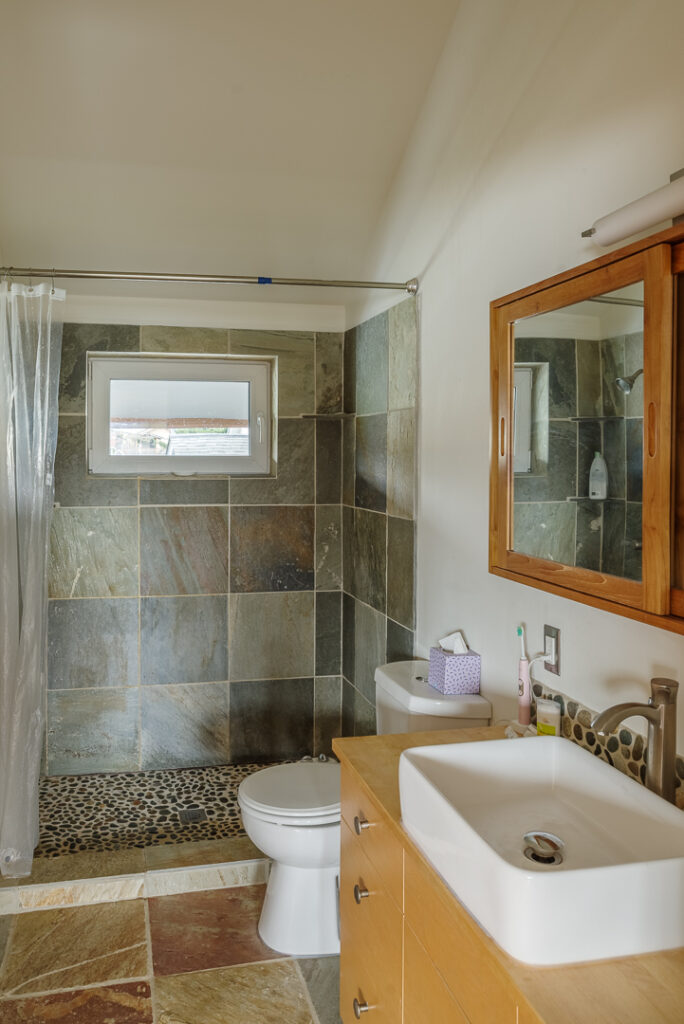
The very dark bathroom was the deepest and most welcome part of the summer-cave, a heavy earth-tile retreat, darkly contrasting with the bright, bright apartment (delete repeated word).
I never lived in the Murphy house with anyone, and there remain questions in my mind about privacy & the closeness of the bedrooms to the common areas. To my mind Ted’s Leong house addresses most of these concerns.
The western light poured through the double doors in the summer; orange and yellow and picked up the yellow fir floors. It was a golden place.


Recent Comments